How to Customise Fee Receipts in Kriyo?
Overview
Kriyo allows you to design customised fee receipts that reflect your school’s identity and branding.
You can include your school name, logo, address, trust or company details, and important notes, ensuring every receipt looks professional and consistent when shared with parents.
You can make basic customisations directly from the School Profile (available on both mobile and web).
For advanced receipt design options, use the Configurations → Customise Fee Receipt section in the Kriyo Web version.
If you need to update your school’s basic details and ensure they appear correctly on your receipts, you can do it directly from the School Profile on the mobile app.
- Open the Kriyo Mobile App and log in with your credentials.
- Tap See All Features on the home page.
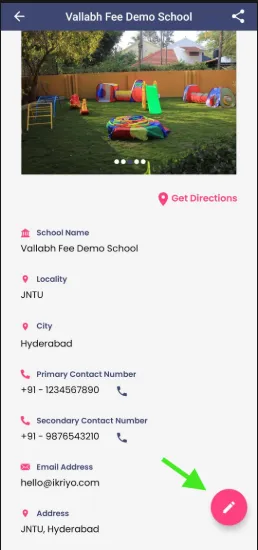
- Scroll down to the Profile section and select School Profile.
- Tap the Edit (pen) icon.
- Review and update the following details:
- School Name – Appears in the header section of your receipt.
- City/Locality – Added automatically in the address section.
- Address – Enter the remaining part of your address (excluding city/locality) to avoid duplication on the receipt.
- Zip Code – Captured separately and automatically added.
- Trust or Company Name (Optional) – Add this if you wish to display your legal entity or organisation name.
- Company Identification Number or GST Number (Optional) – Mention in brackets next to the trust or company name, if needed.
- School Logo – Upload your logo to display it on all receipts.
- Click Save to apply your updates.
Once saved, this information is automatically included on every digital fee receipt.
Parents can instantly download the receipt after making a payment through the Kriyo Parent App or once the school updates outside-the-app payments manually.
For more advanced customisations or creating receipts for different entities, refer to the Web version of this article below.
Related Articles
Related FAQs