Product Guide: Academic Year Configuration in Kriyo
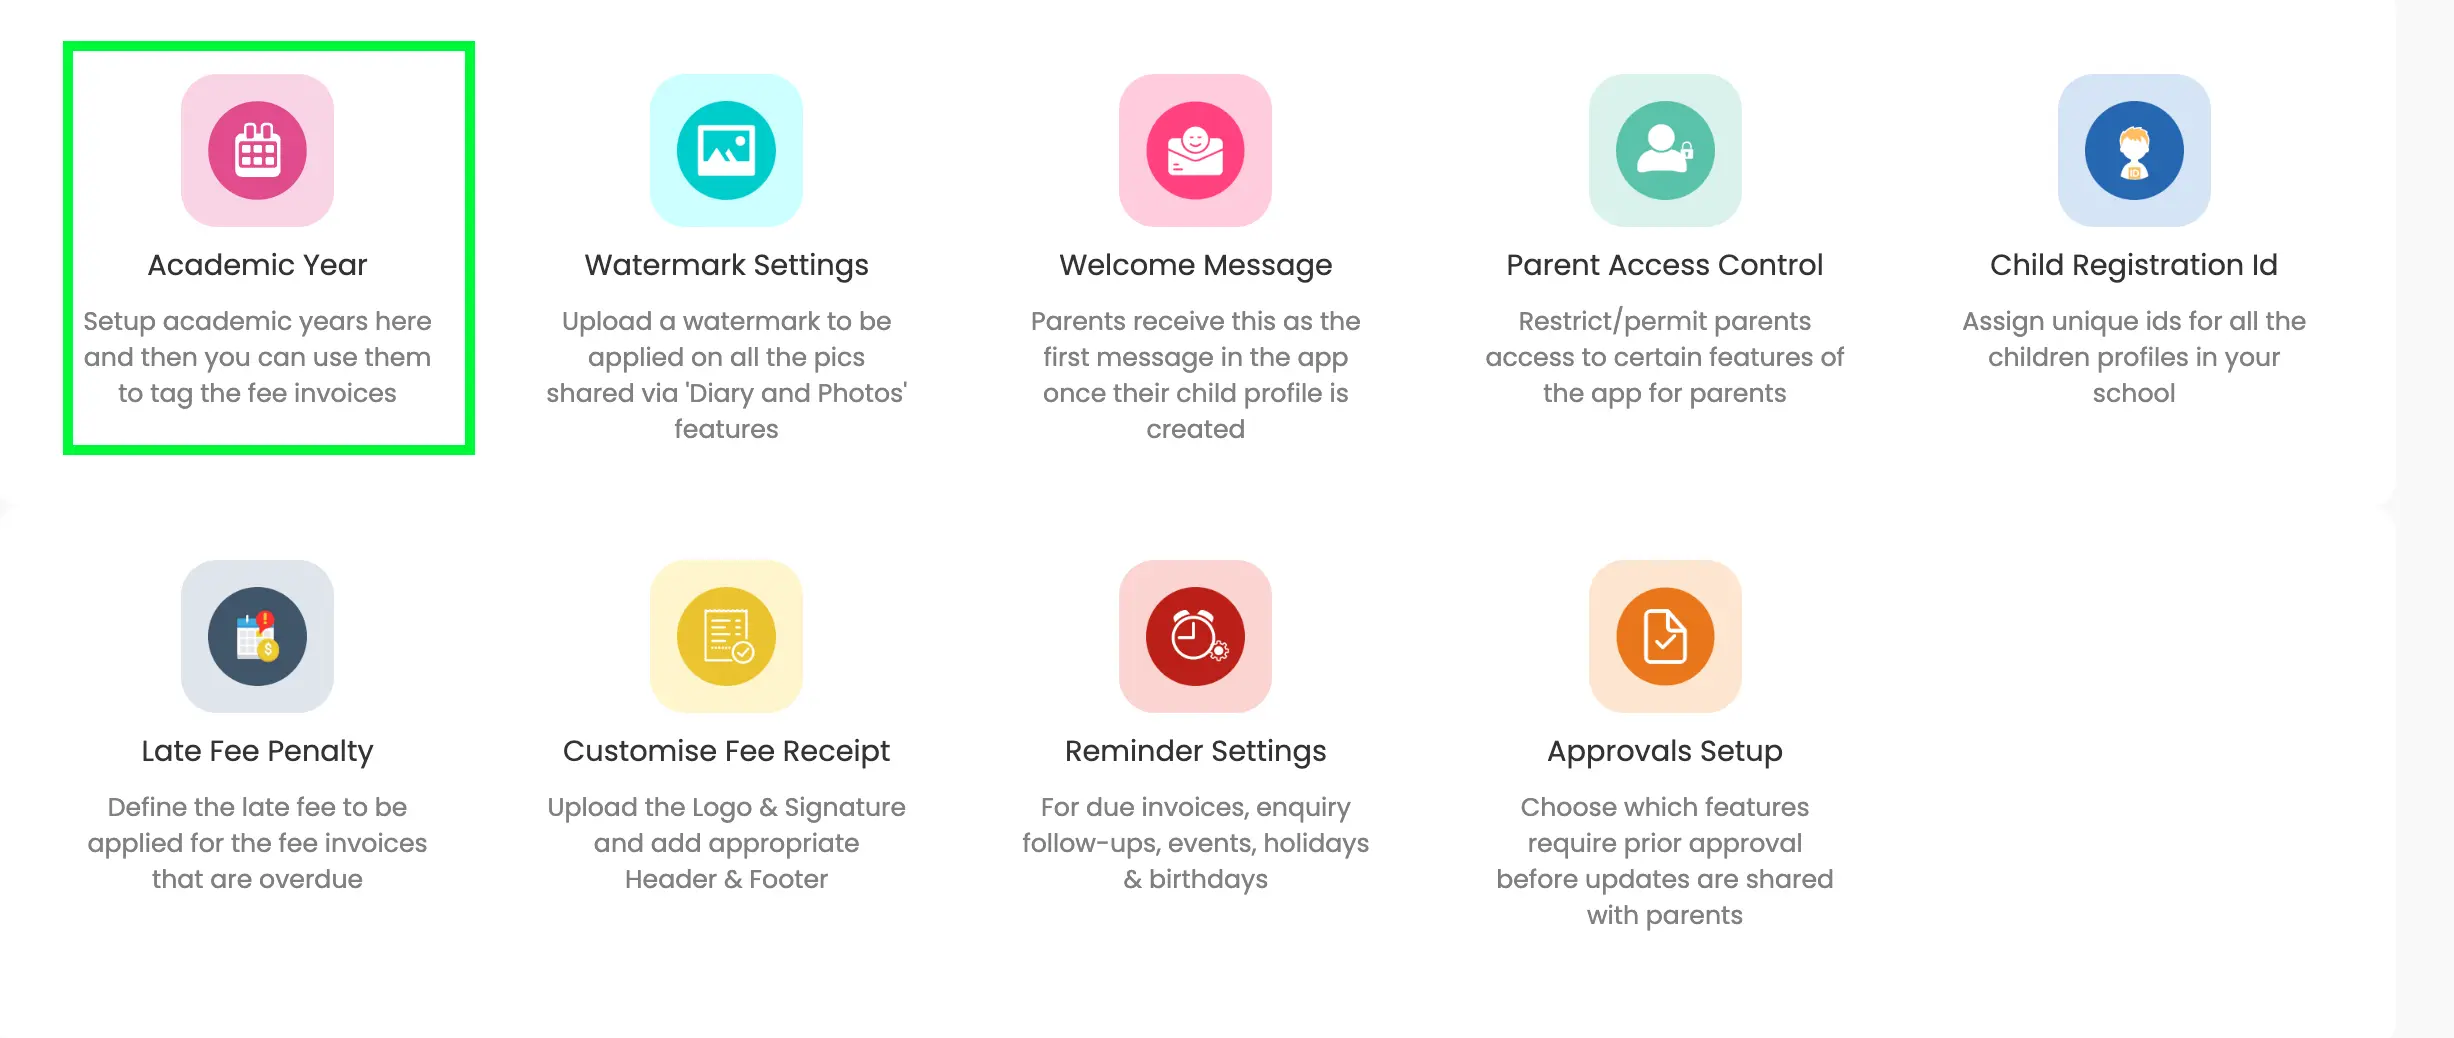
Academic Year configuration is available only on Kriyo Web under Admin Tools → Configurations → Academic Year. This setting helps schools organise fee templates, invoices, and reports year-wise instead of mixing data across multiple academic years.
Adding and Managing Academic Years
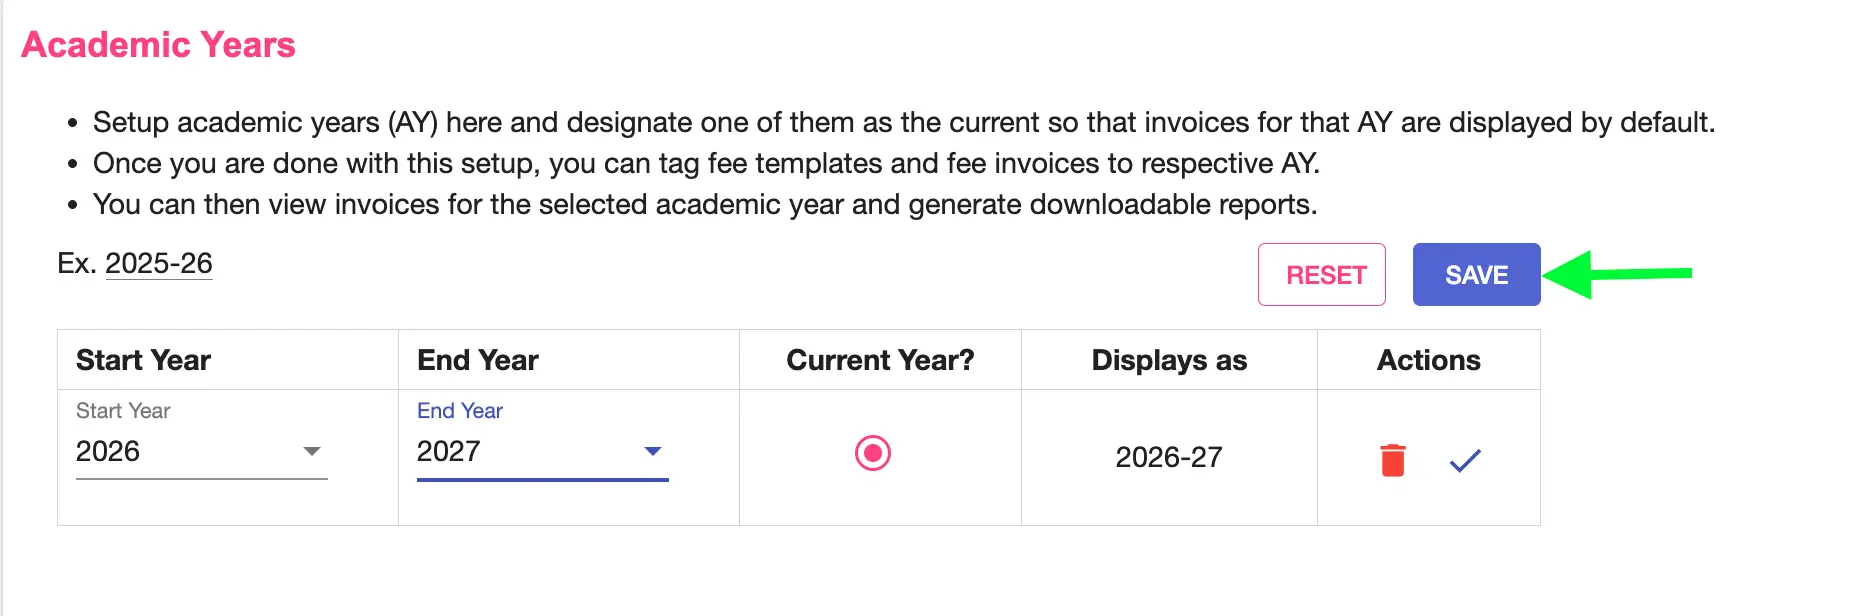
In Configurations → Academic Year, you can add one or more academic years by clicking the plus (+) button, entering the start and end year, and saving it. One academic year can be marked as Current, which becomes the default year used across the fee module.
If Academic Year is not configured, invoices will appear with “None” selected by default.
Assigning Academic Year to Existing Fee Invoices
After setting up academic years, existing invoices need to be assigned to the correct year.
To update a single invoice, open the invoice, click Edit, select the academic year, and save.
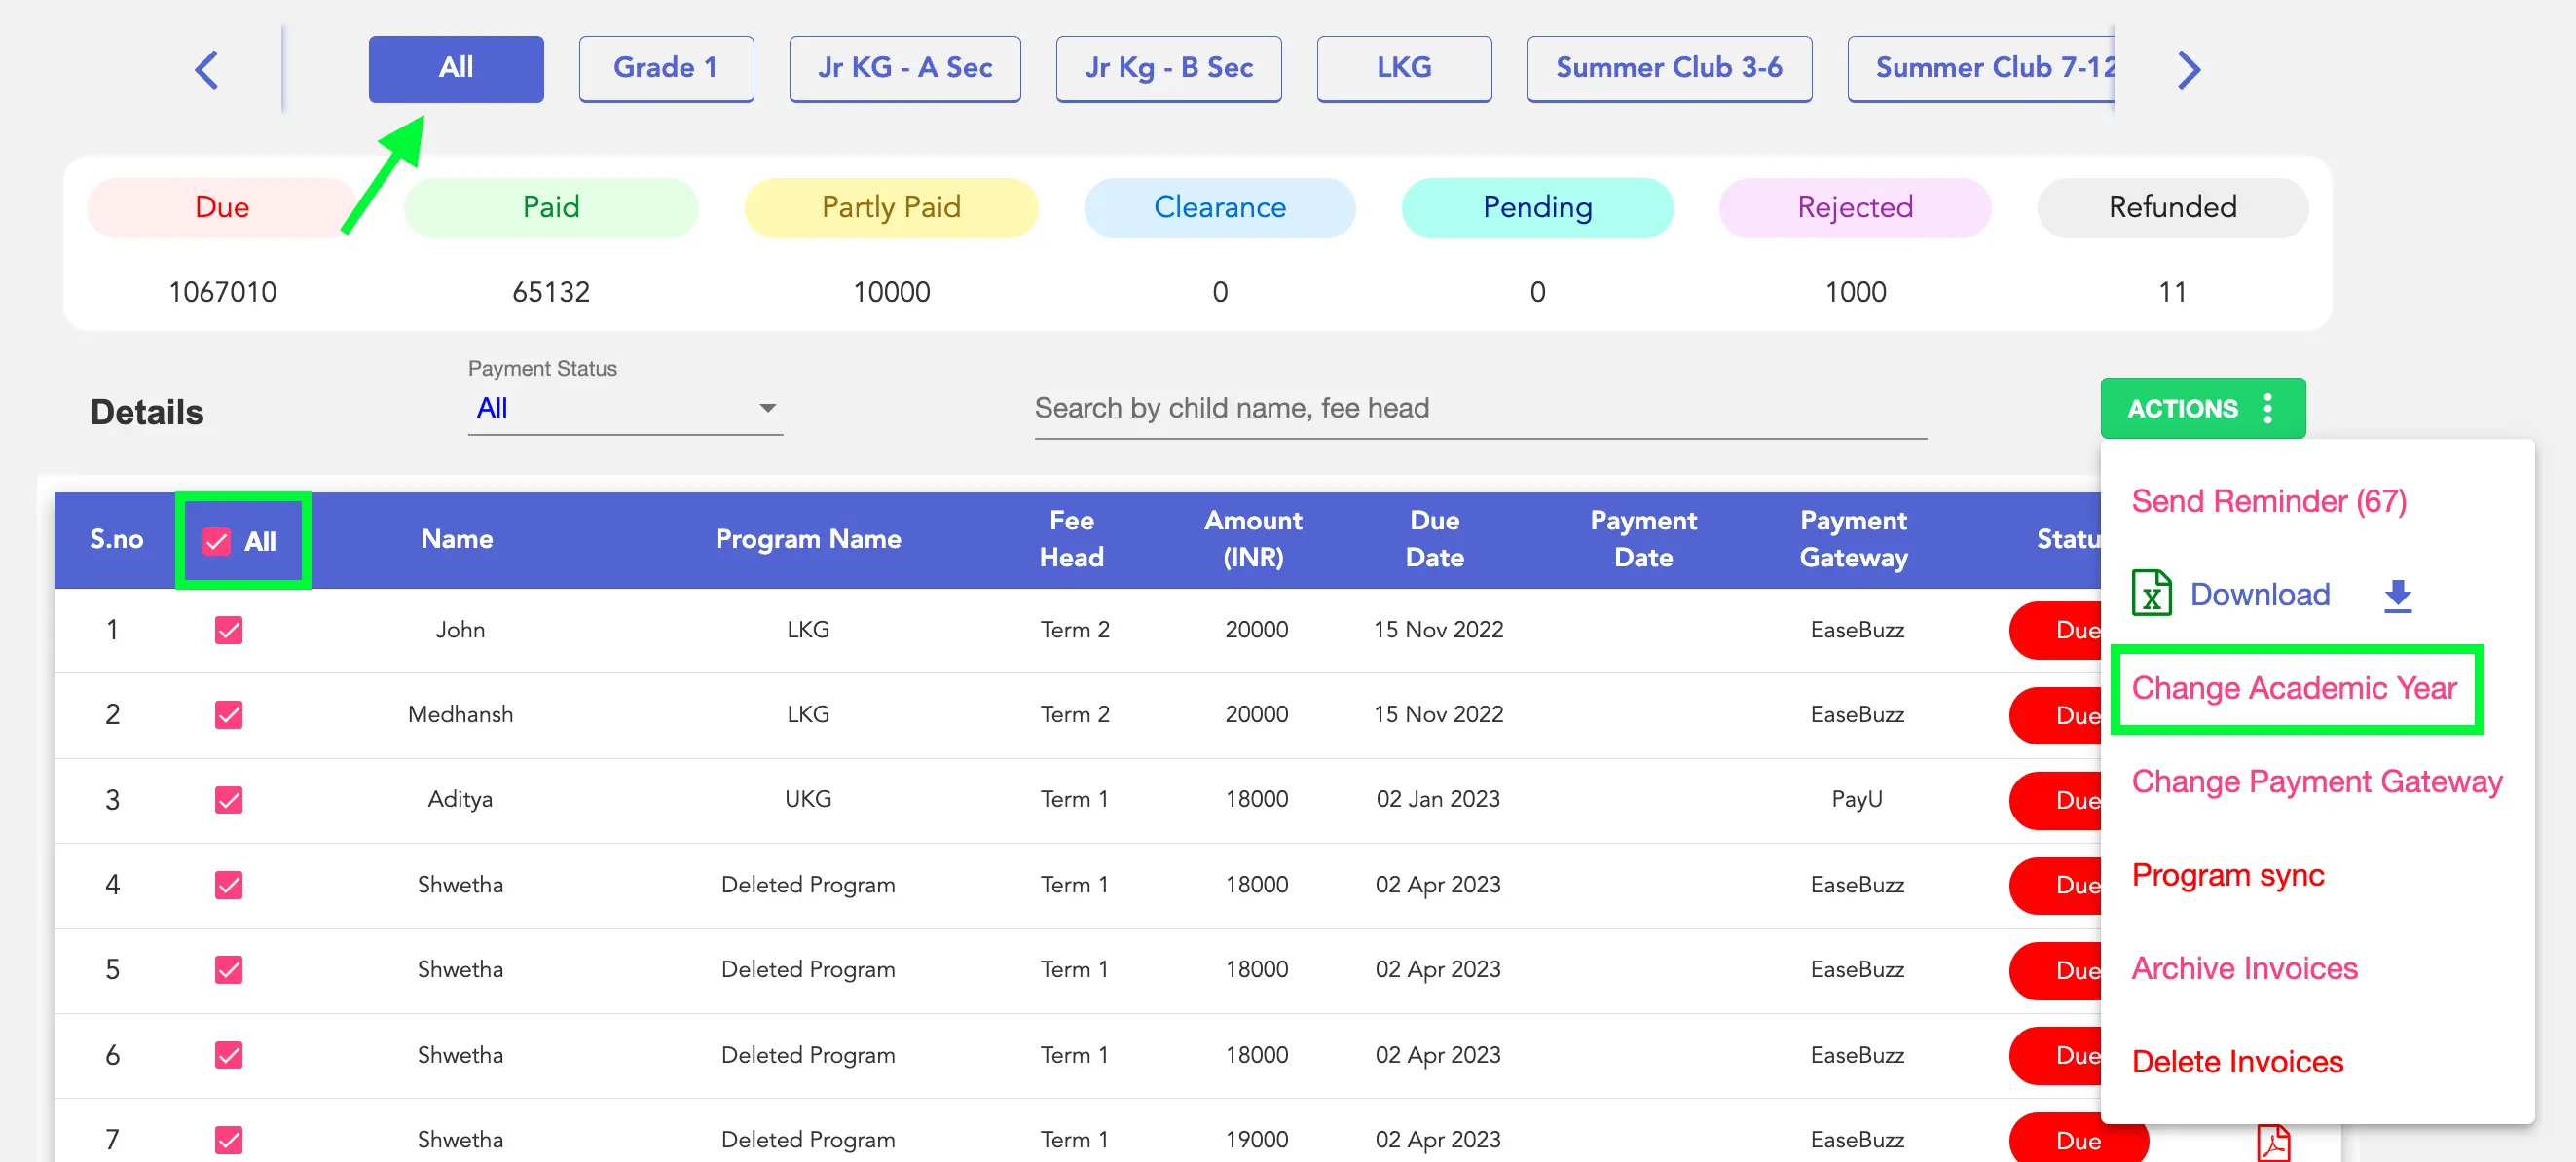
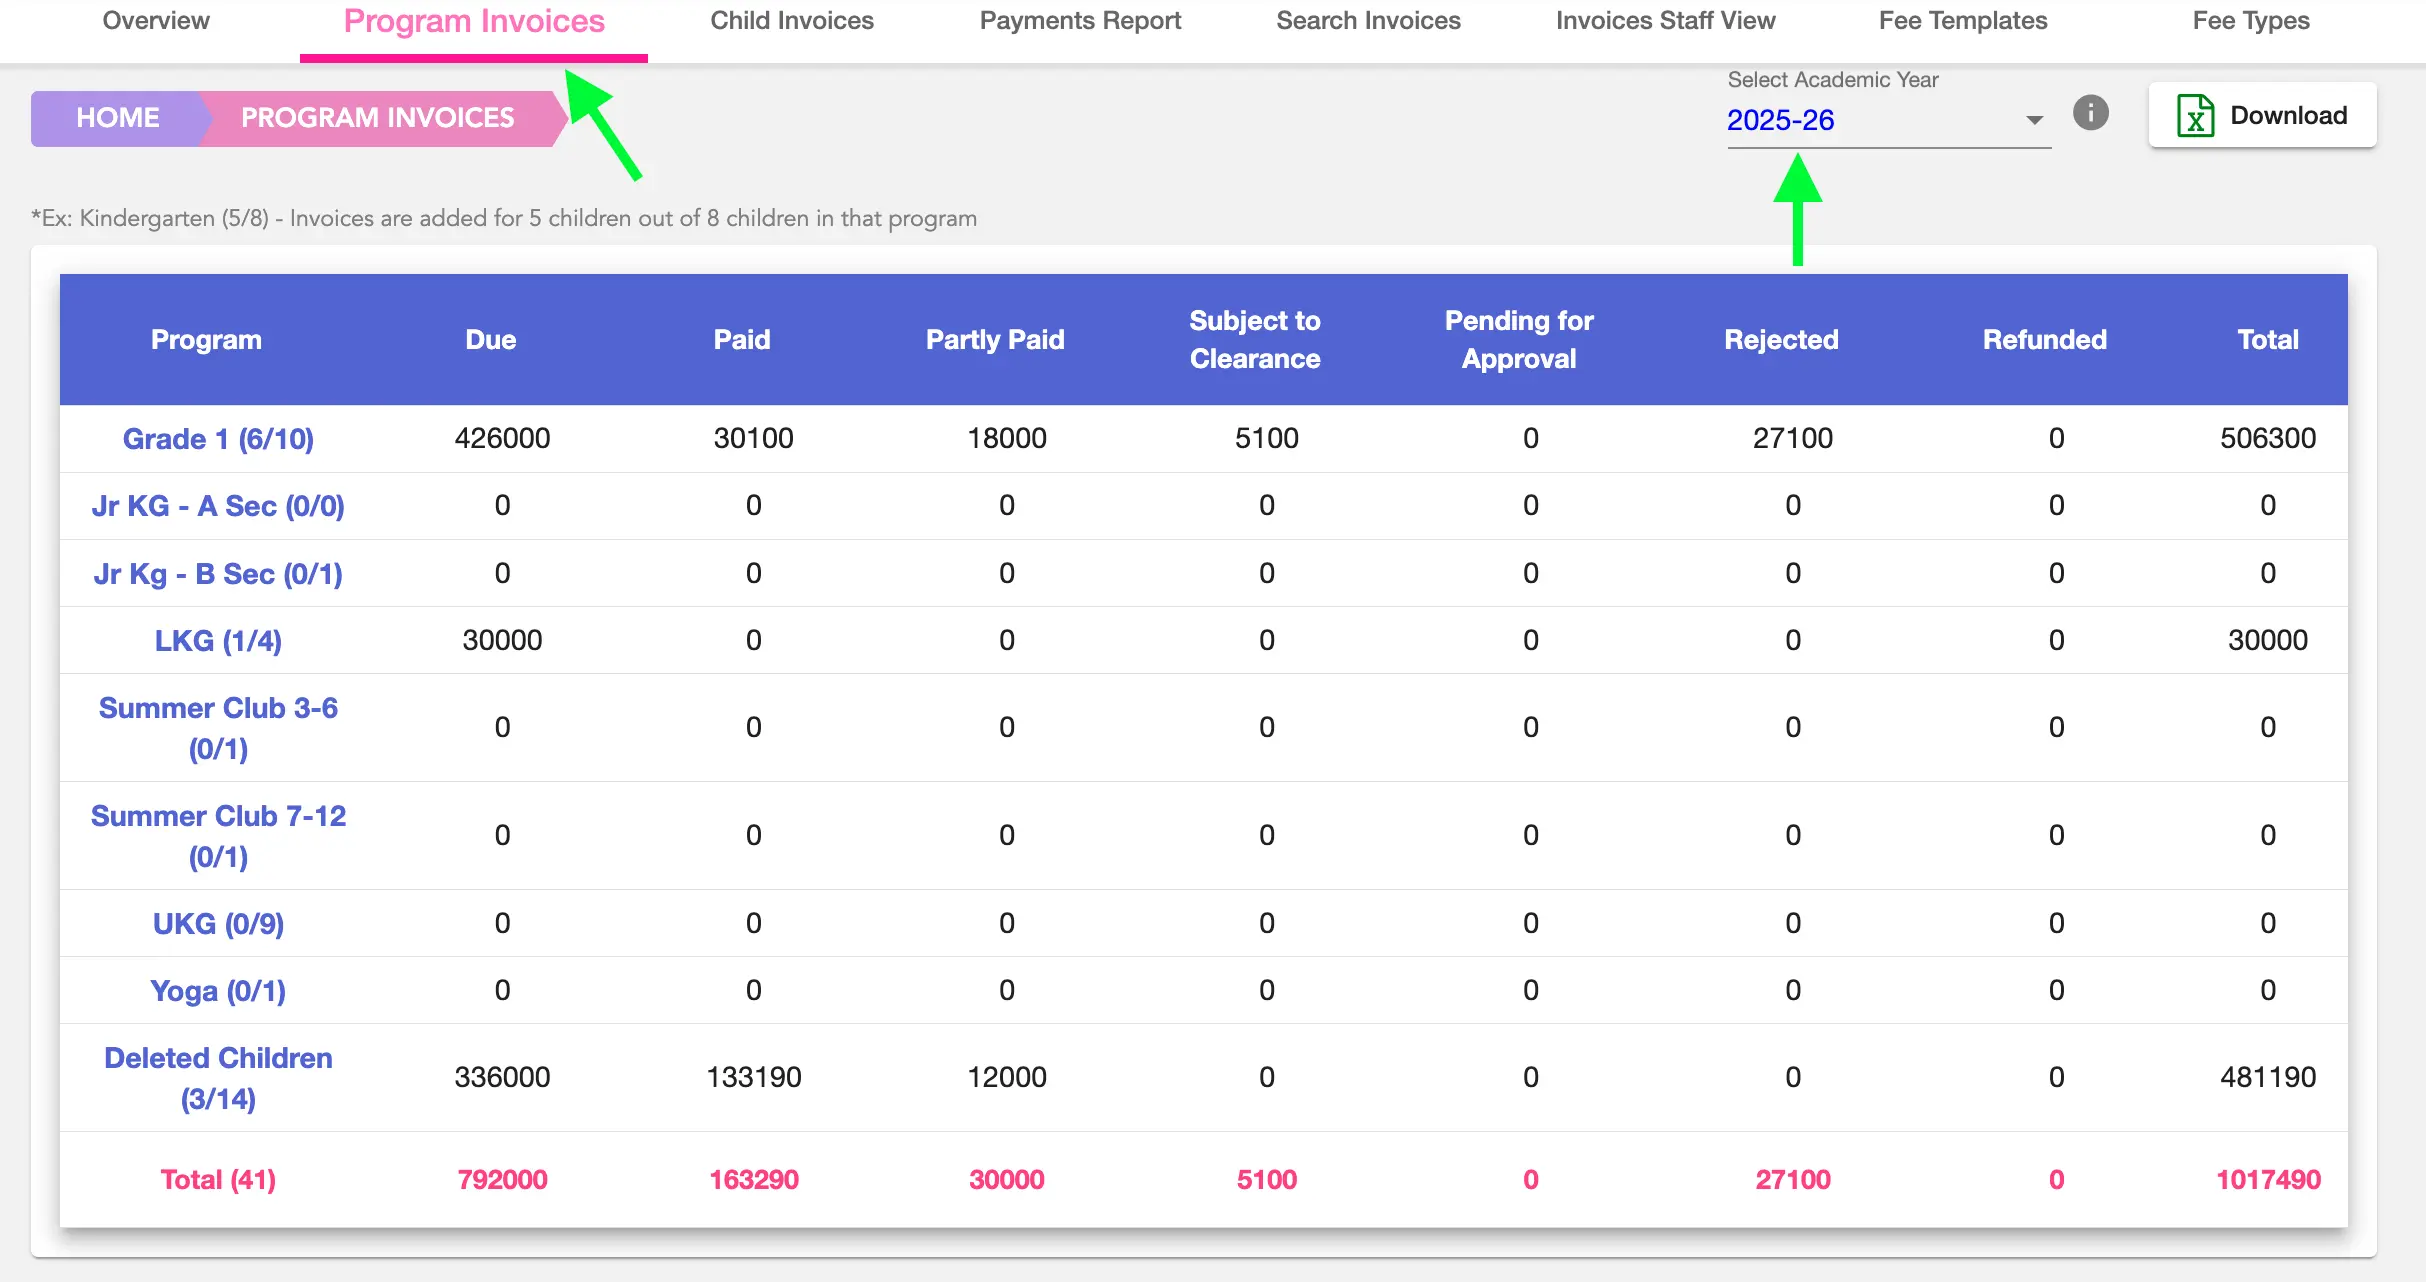
To update multiple invoices at once, go to Fee Invoices → Program Invoices.
Here, you can:
- Select invoices for a specific program, or
- Click All in the programs bar to work across all programs
After selecting the required invoices, click Actions → Change Academic Year, choose the academic year, and save. This allows schools to organise invoices program-wise or across the entire school in one go.
Assigning and Managing Academic Year for Fee Templates
Academic Year can also be assigned or changed for existing fee templates.
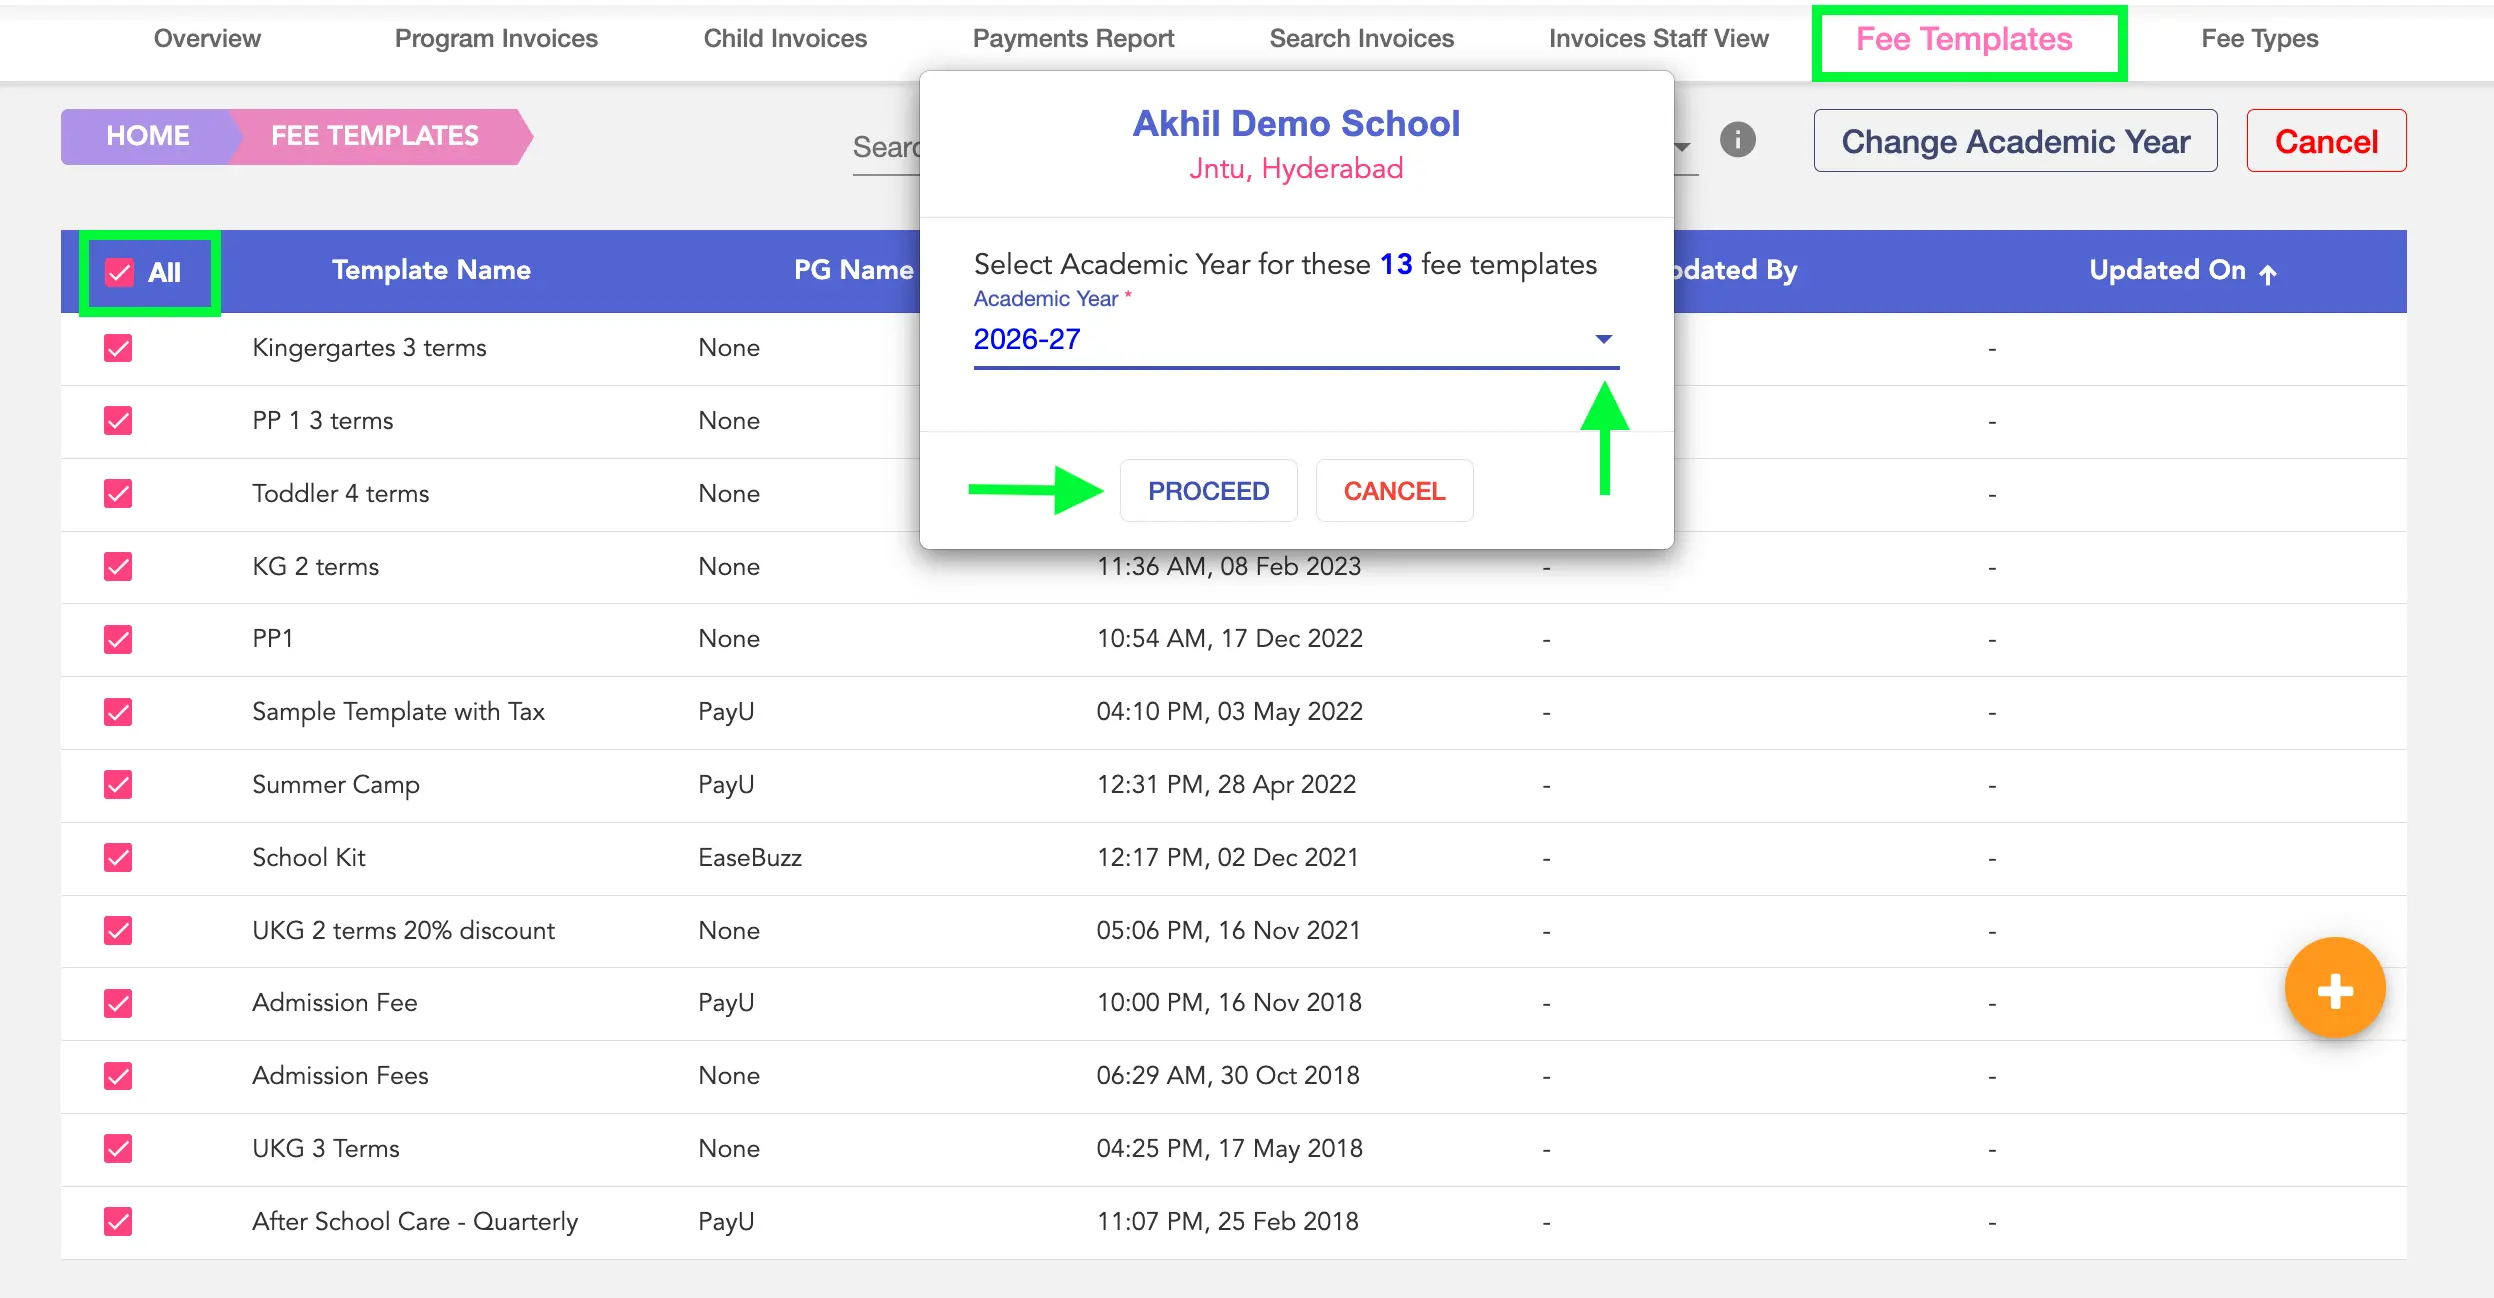
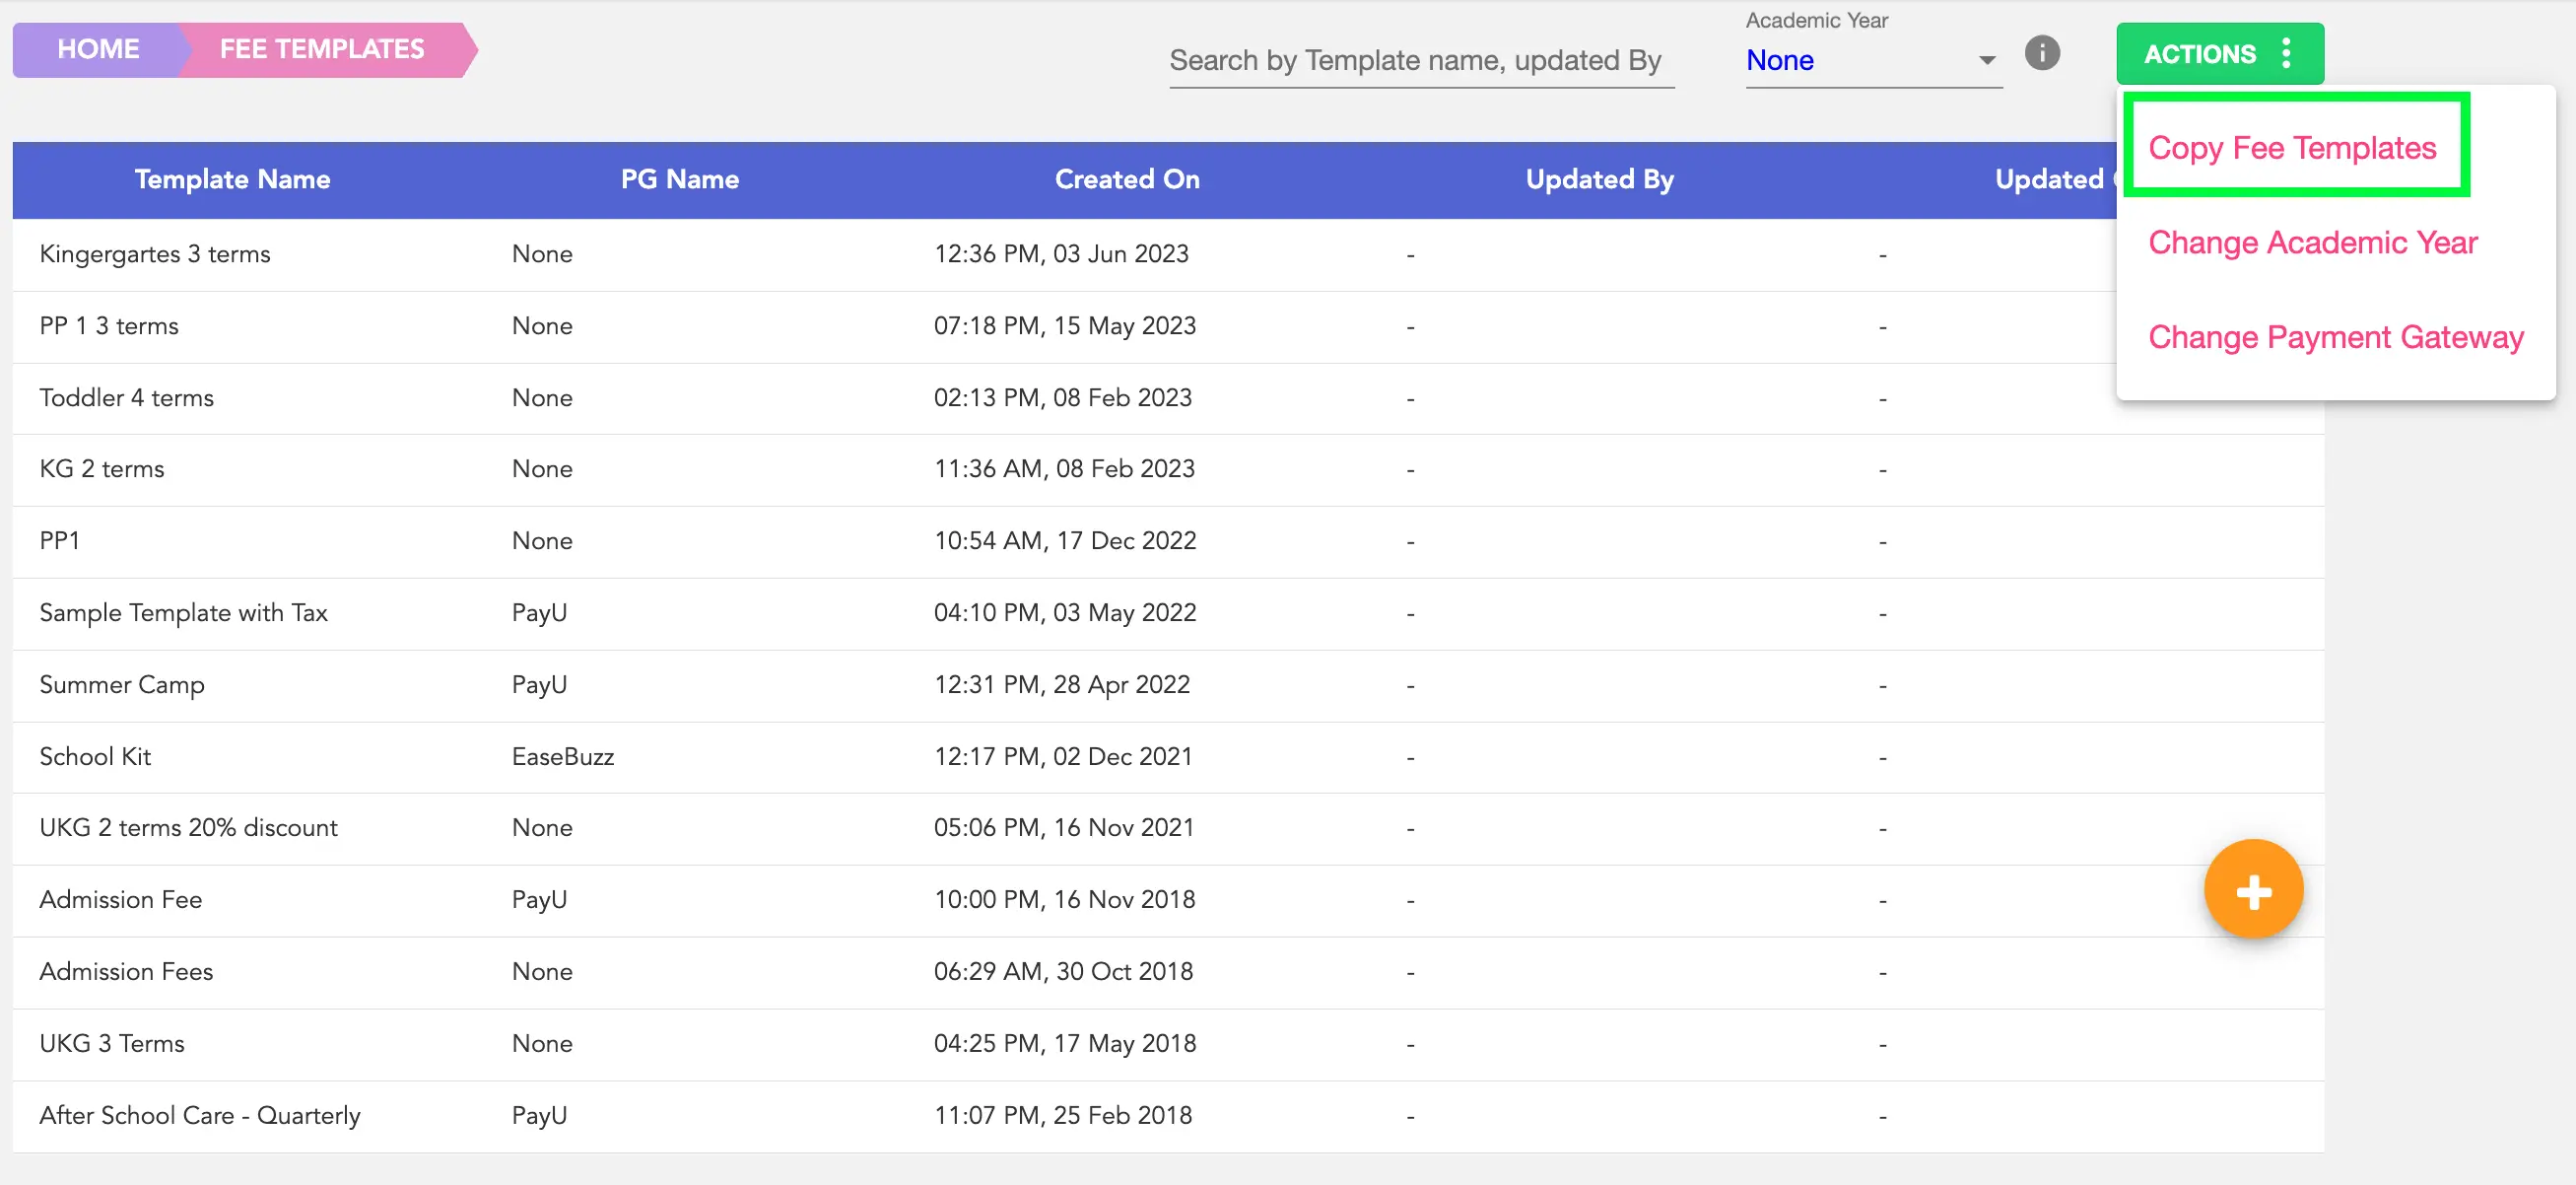
Go to Fee Invoices → Fee Templates, click Actions → Change Academic Year, select one or multiple templates, choose the academic year, and save.
Copying Fee Templates Across Academic Years
To reuse existing templates for a new academic year, schools can use Copy Fee Templates.
From Fee Invoices → Fee Templates, click Actions → Copy Fee Templates, select the required templates, choose the target academic year, and click Proceed.
This helps schools quickly roll over fee structures without recreating templates from scratch.
Using Academic Year in Fee Management
Once configured, schools can:
- Select academic years while creating or editing fee templates
- Assign academic years when adding or marking fee invoices as paid
- Generate reports filtered by academic year
This keeps fee data clean and ensures accurate year-on-year reporting.
Switching Between Academic Years
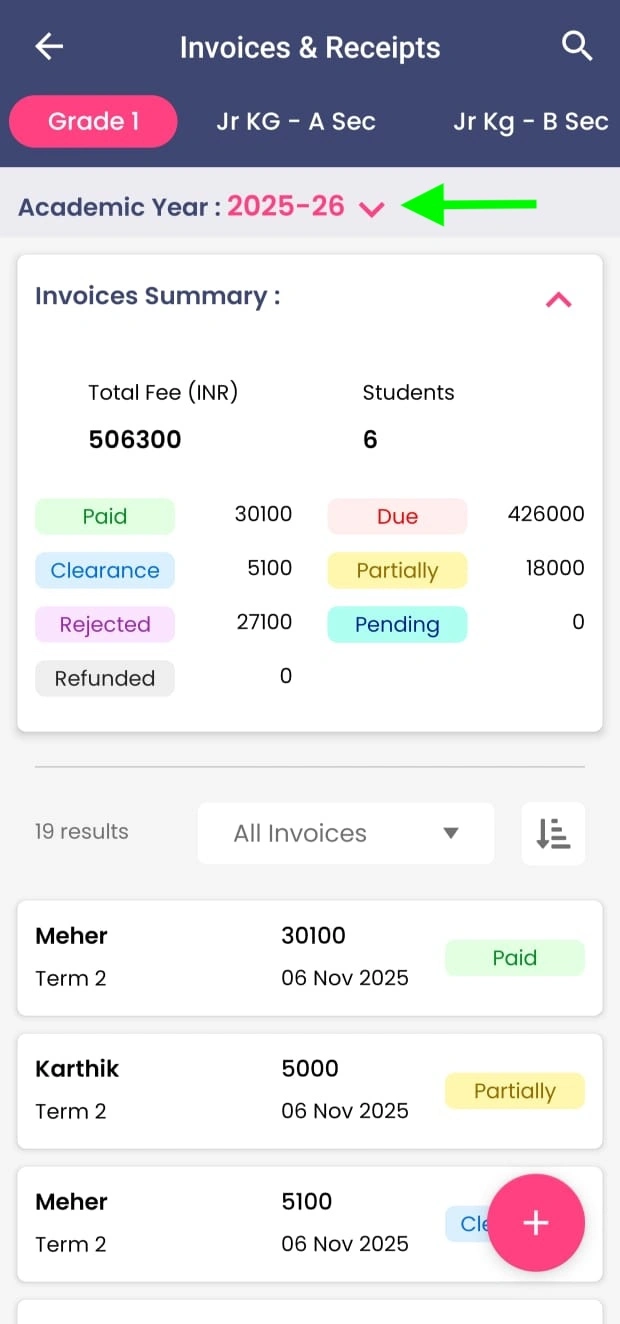
On the mobile app, the academic year can be selected from the dropdown at the top of the Fee Invoices screen.
On Kriyo Web, the academic year selector is available at the top right corner in Fee Invoices → Program Invoices.
Deleting and Restoring an Academic Year
An academic year can be deleted even if invoices are linked to it. However, it is recommended to first move or reassign those invoices to another academic year.
If an academic year is deleted without reassignment, the linked invoices will disappear from view.
If deleted accidentally, you can restore access by adding the same academic year again (with the same start and end year). All previously linked invoices will automatically reappear.
Common Scenarios
- Invoices seem to be missing: They are likely linked to a deleted or different academic year. Re-add or switch the academic year to view them.
- Academic Year shows “None”: Academic Year is not configured or invoices haven’t been assigned yet.
- Reset option: Reverts Academic Year configuration to the last saved state.
This configuration helps schools keep fee data structured, improves reporting clarity, and makes audits and year-wise analysis significantly easier—especially as data grows over time.