How to use the expenses feature in Kriyo?
The Expenses feature in Kriyo helps schools record and manage all expenses in one place—making it easier to track spending, review records, and prepare data for accounting or audits. This product guide walks you through how to add, manage, filter, and download expenses step by step.
Where to Find Expenses in Kriyo
To access the Expenses module:
- Log in to Kriyo Web or the Kriyo App
- Navigate to Expenses
- You’ll see a sample expense by default to help you understand how entries are structured.
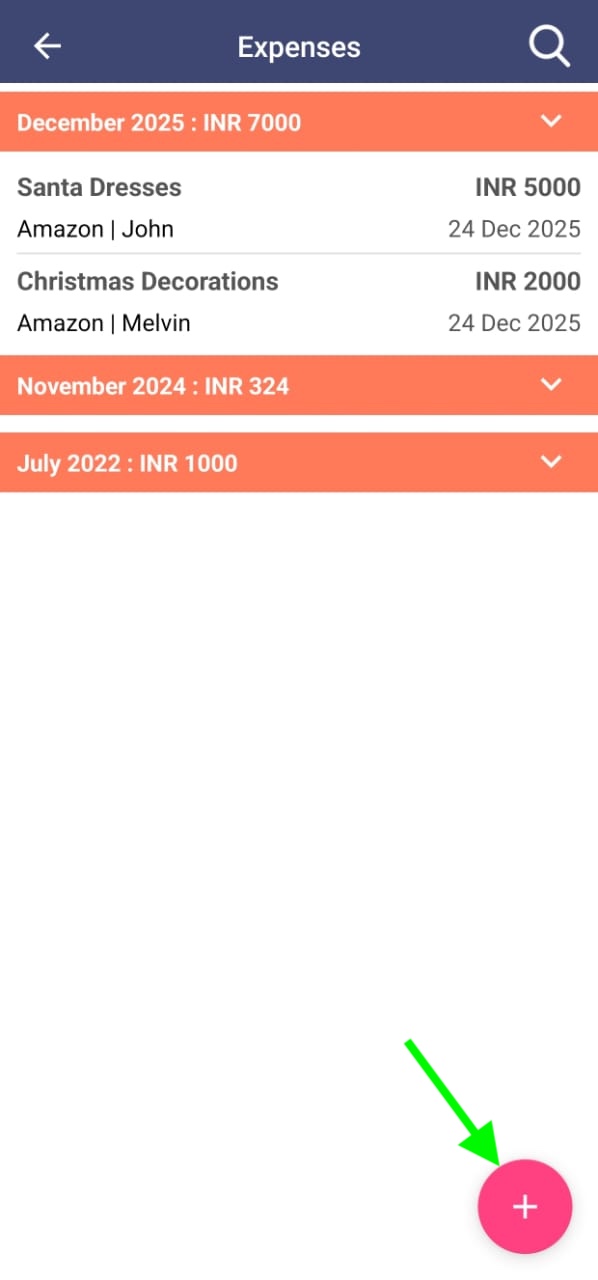
Understanding Expense Details
Each expense in Kriyo can capture comprehensive information, including:
- What the expense was for
- Expense amount (auto-reflects the school’s local currency)
- Expense category (customisable by the school)
- Payee or vendor name
- Payment mode (cash, card, bank transfer, etc.)
- Payment date
- Who paid for the expense
- Split payments (if multiple people contributed)
- Reference number (optional)
- Bill or receipt attachment
- Notes for additional context
This level of detail ensures expenses are clear, verifiable, and easy to review later.
Adding a New Expense
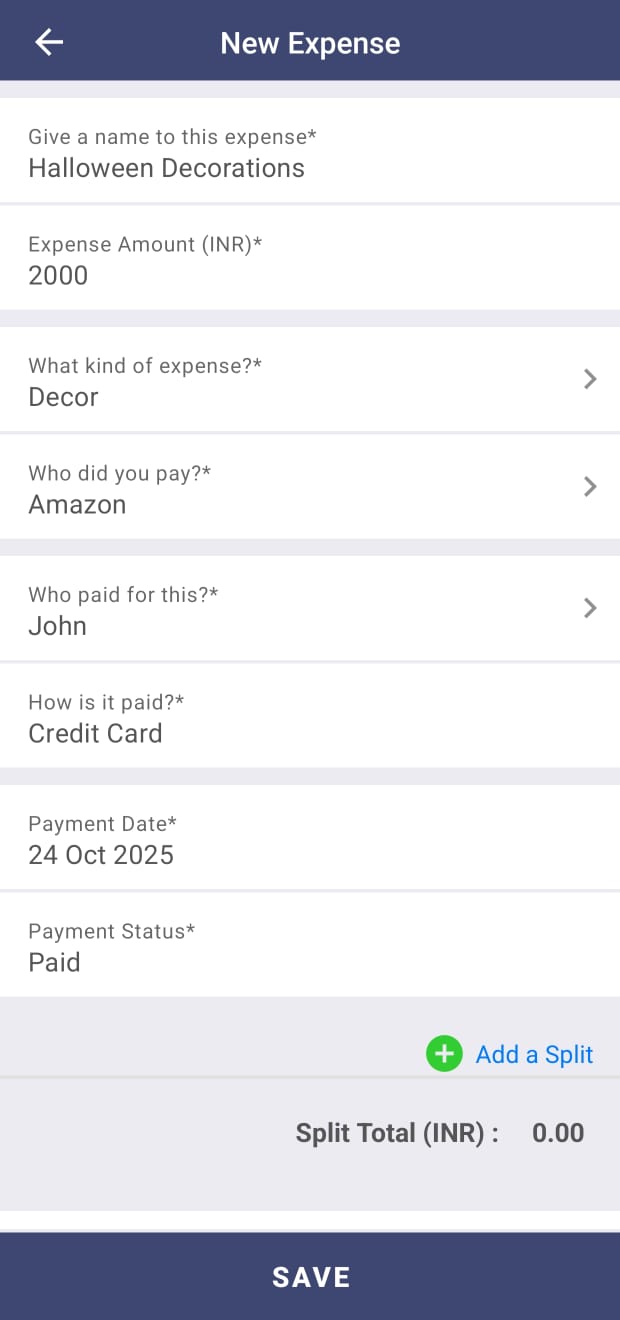
To add an expense:
- Click the plus (+) button at the bottom right corner
- Enter the required expense details
- Attach a bill or receipt, if available
- Add notes if the expense needs explanation
- Click Save
The expense is immediately added to the list.
Editing or Deleting an Expense
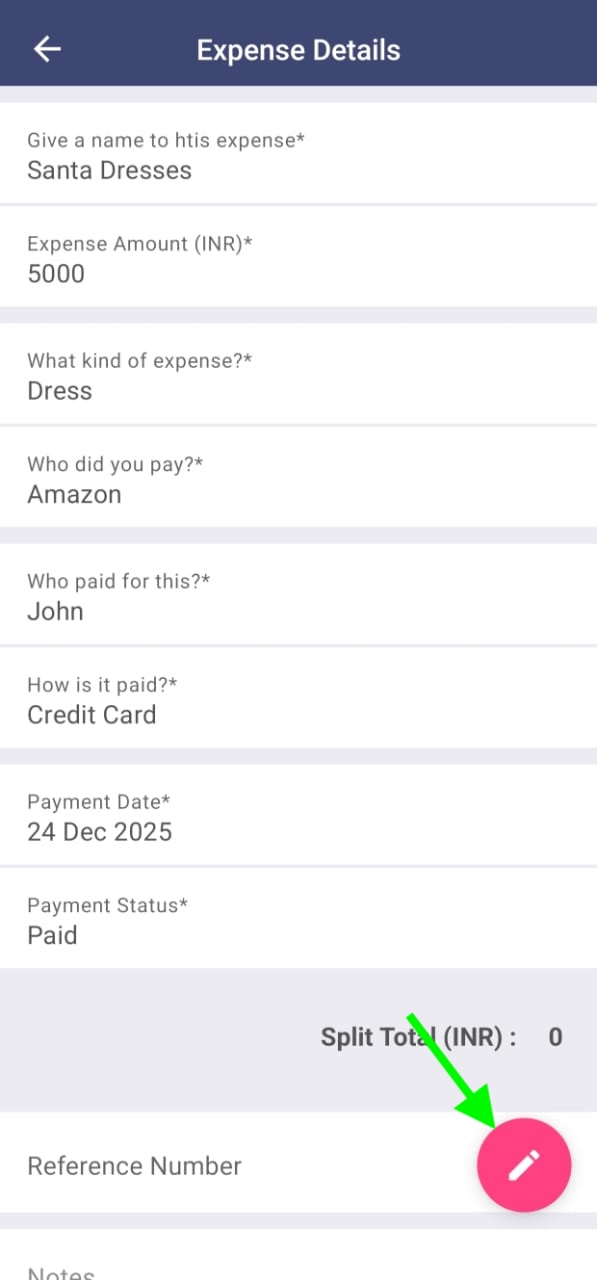
If you need to make changes:
- Open the expense and click Edit
- Update any required fields
- Click Save to apply changes
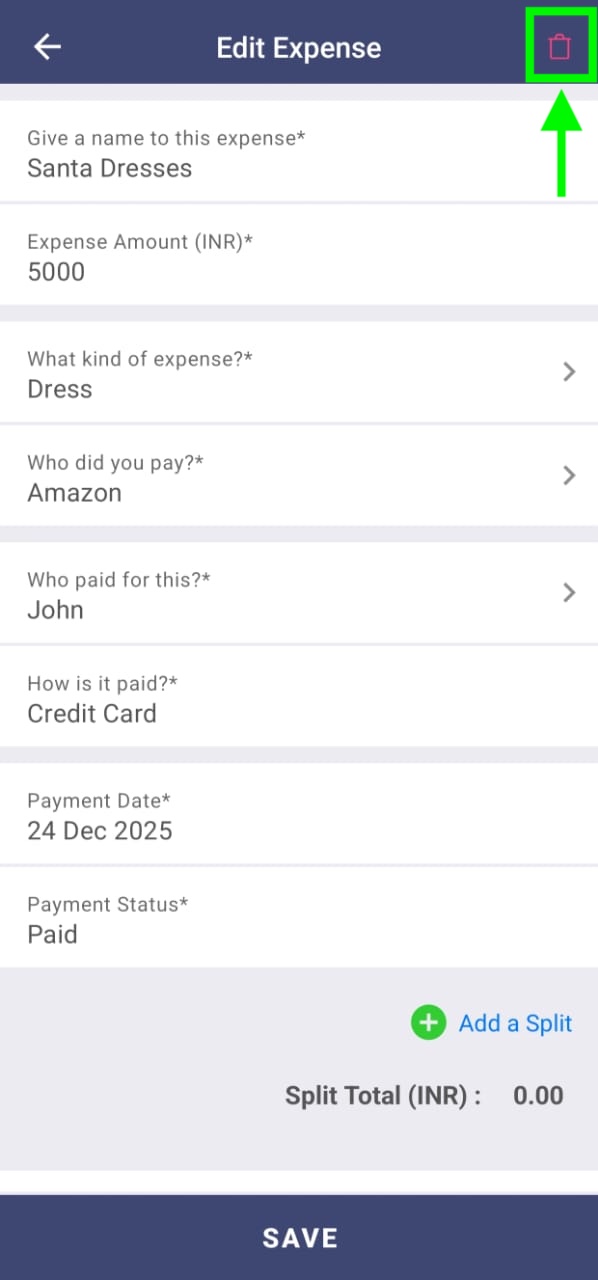
If the expense is a duplicate or no longer needed:
- Click Edit
- Use the Delete icon at the top right corner
Searching for Expenses
You can quickly search for expenses using keywords such as:
- Expense name or description
- Category
- Payee or payer name
This makes it easy to locate specific records without scrolling through the entire list.
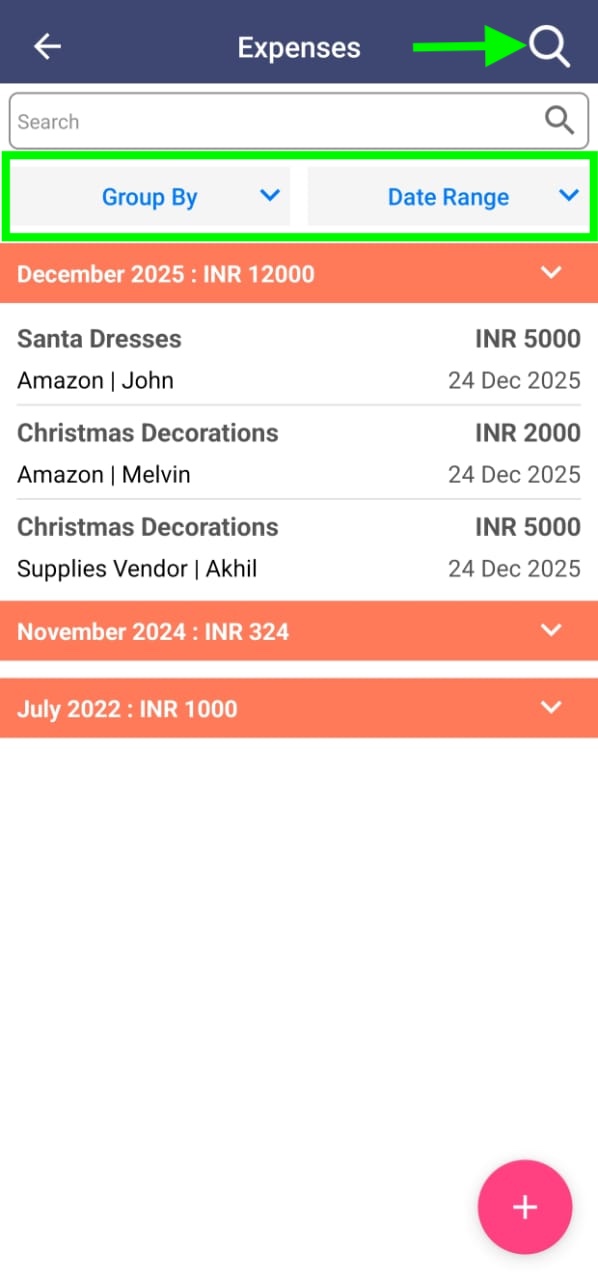
Grouping and Filtering Expenses
To analyse expenses more effectively, Kriyo provides grouping and filtering options.
You can:
- Group by payee, payment account, payment mode, or expense category
- Filter by date range (current month, year, or custom range)
On mobile, filters help narrow down records for viewing.
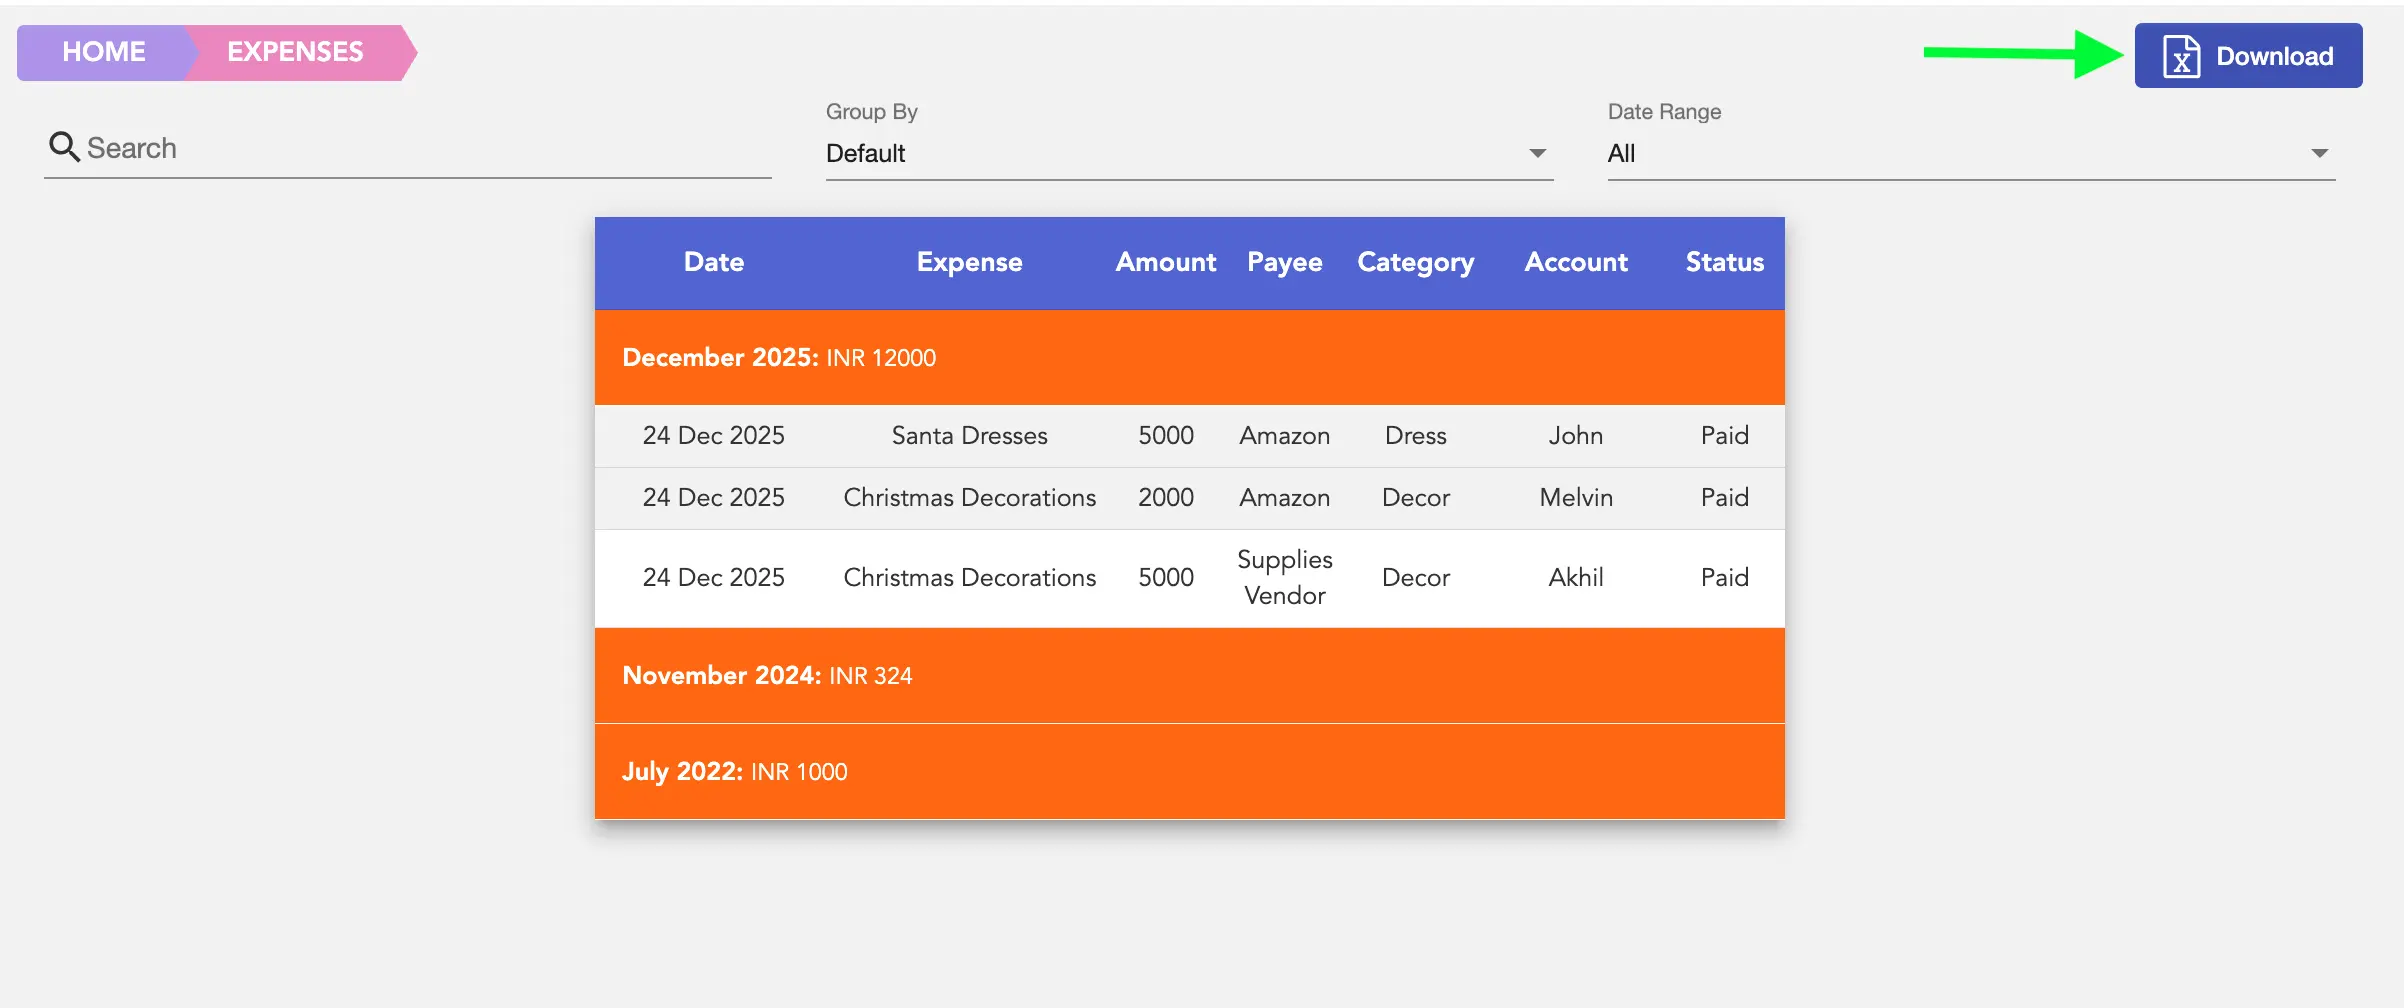
On web, these filters can be combined with downloads for reporting.
Downloading Expense Data
On the web version, you can download expense records:
- Apply the required filters or date range
- Click the Download button at the top right
- Export the data as an Excel file
This is especially useful for accounting, reimbursements, and audits.
Best Practices for Using Expenses in Kriyo
To get the most value from this feature:
- Create clear expense categories early
- Admins can control who can add expenses and who can fully manage expense records
- Attach bills or receipts whenever possible
- Use notes to explain non-obvious expenses
- Review expenses regularly instead of waiting for month-end
The Expenses feature in Kriyo is designed to give schools clarity and control over their spending—without adding complexity to daily operations.