How to enable Geo-location-based QR check-in in Kriyo?
Ensure secure, location-based attendance for staff
Geo-fencing in Kriyo helps schools, preschools, and childcare centers ensure that staff attendance can be marked only from within the school premises, preventing misuse or remote check-ins.
Once enabled, Kriyo generates a single, school-wide, unique QR code that all staff can scan to check in or out — and attendance will be recorded only if they are within the set GPS location of your school.
Step 1: Set your school’s GPS coordinates
- Go to See All Features › School Profile under the Profile section.
- Tap on the Edit button at the bottom right.
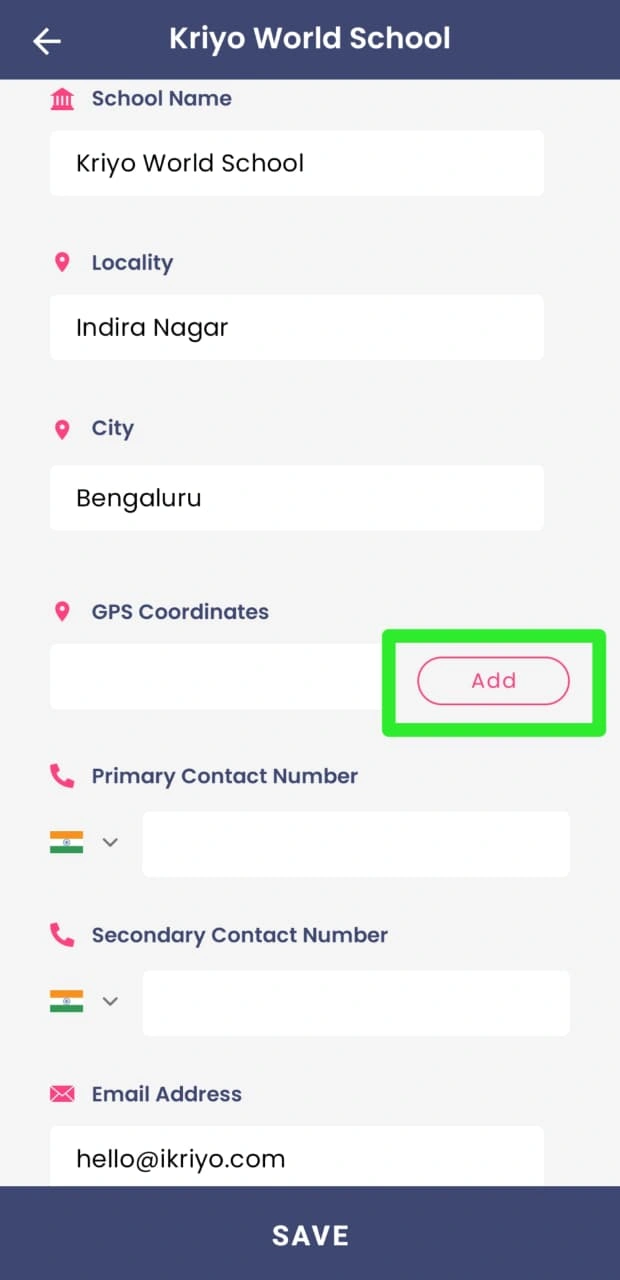
- Scroll down to find the field named GPS coordinates (below the City field).
- Tap on the Add button.
- When prompted, allow location access for the Kriyo app.
- Kriyo will automatically pick your current location’s GPS coordinates.
- Once the coordinates appear, tap Save at the bottom.
- The school profile will now be updated with your location details.
- You may not see the coordinates displayed after saving — this is normal.
📍 Tip: Make sure you perform this step from the exact spot where you want staff to check in, such as the office or reception area in your school. This ensures accurate geofencing.
Step 2: Verify your Geo-fence accuracy
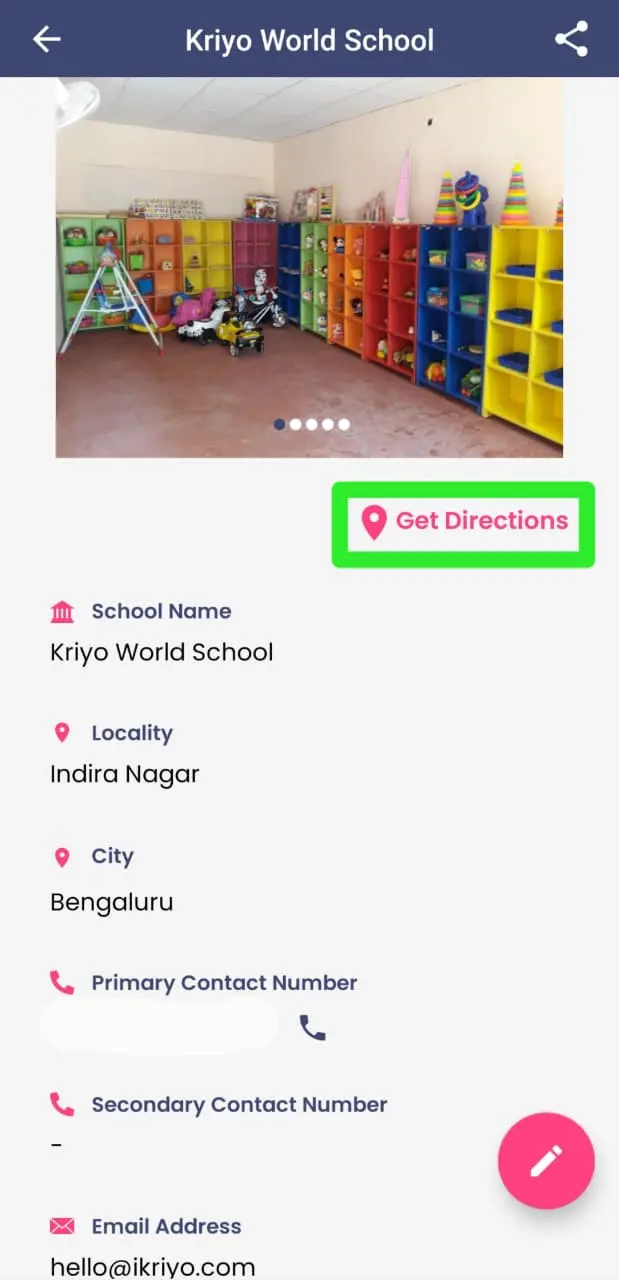
- After saving, click on the Get Directions (pink button) under the photos section in the School Profile.
- Kriyo will calculate the distance between your current location and the saved GPS coordinates.
- Ideally, the distance should be 0 meters (or less than 50 meters) for accurate check-in validation.
Step 3: Download the GPS attendance QR code
After setting up the geolocation coordinates and saving them,
- Refresh your account once from the top-left menu of the mobile app.
- Then, go back to the See All Features screen.
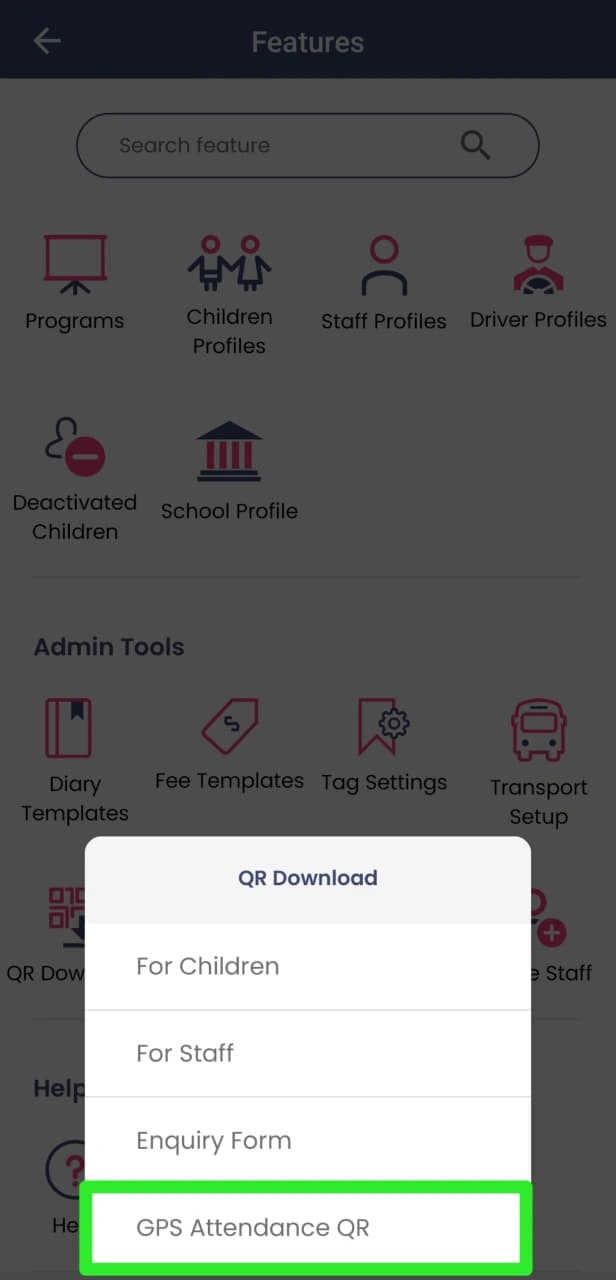
- Scroll down to the Admin Tools section and tap on the QR Download button to download the GPS Attendance QR Code.
- Tap Download, then print and paste the QR code at your chosen check-in location (e.g., reception or staff entry area).
💡 This QR code is unique to your school and will be used by all staff to mark attendance through their own Kriyo app accounts.
Step 4: How staff use it
- To allow staff to check in using QR, make sure the QR Check-in permission is enabled in their profile.
- When staff arrive, they open their Kriyo School App and tap QR Check-In.
📍 First-Time Setup:
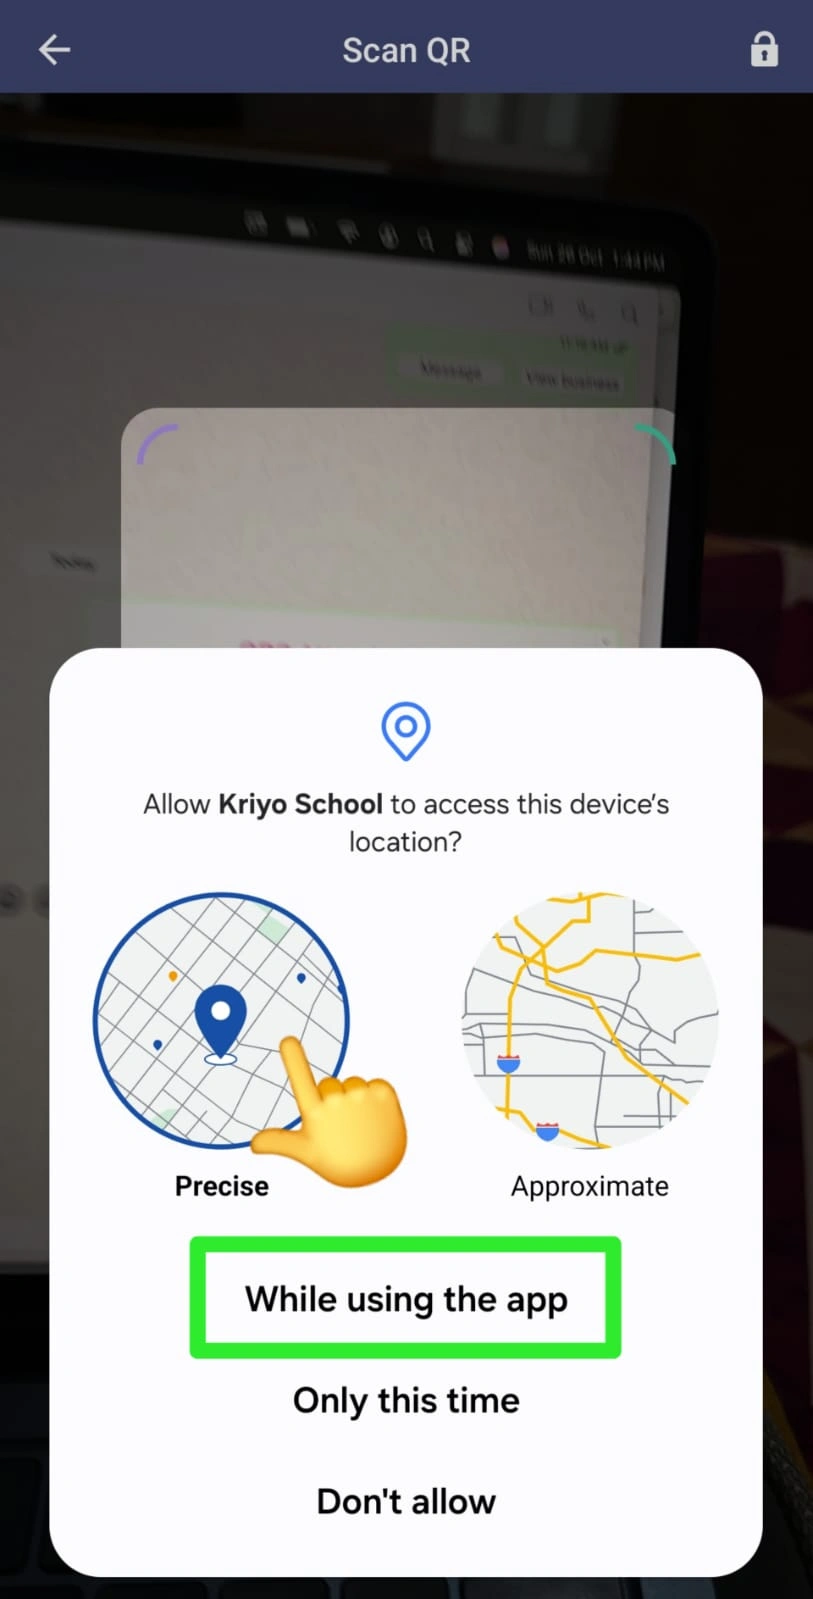
- The first time a staff member taps QR Check-In, they will be prompted to enable location access.
- Make sure to:
- Select Precise Location (not approximate), and
- Choose “Allow while using the app.”
- This ensures that GPS validation works correctly for all future check-ins.
- After location access is enabled, the staff can scan the printed GPS Attendance QR Code.
- Kriyo automatically validates the GPS location.
- Attendance will be marked only if the staff member is within the school’s approved GPS range.
If not, an alert appears:
“You can mark your attendance only when you are in the school premises.”
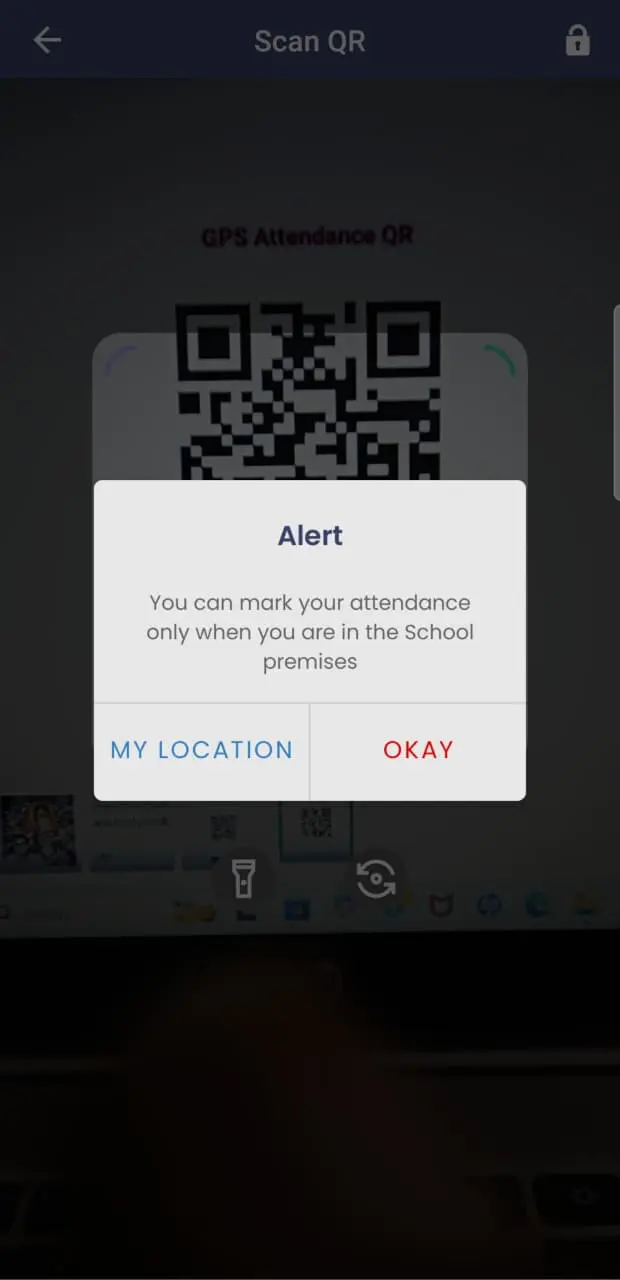
💡 Note: If a staff member accidentally denies location access, they can re-enable it anytime from their phone’s app settings to continue using the GPS QR Check-In feature without issues.
Smart, secure, and hassle-free attendance
With Geo-location based QR Check-in, schools can:
✅ Prevent staff from marking attendance remotely
✅ Eliminate the need for costly biometric devices
✅ Get accurate, GPS-verified attendance logs in real time
Every check-in and check-out is timestamped, validated, and reflected instantly in attendance reports — ensuring transparency and trust.