How do I set up Inventory Management for my school?
Setting up inventory in Kriyo is a simple and one-time task. Once it's set up, the system automatically updates your stock levels whenever you purchase new items or issue them to students, so you always know what’s in stock.
Follow the below six simple steps to set it up.
Create Categories
Categories are a group of similar items to keep your inventory organised, for example, Books, Uniforms, or Stationery.
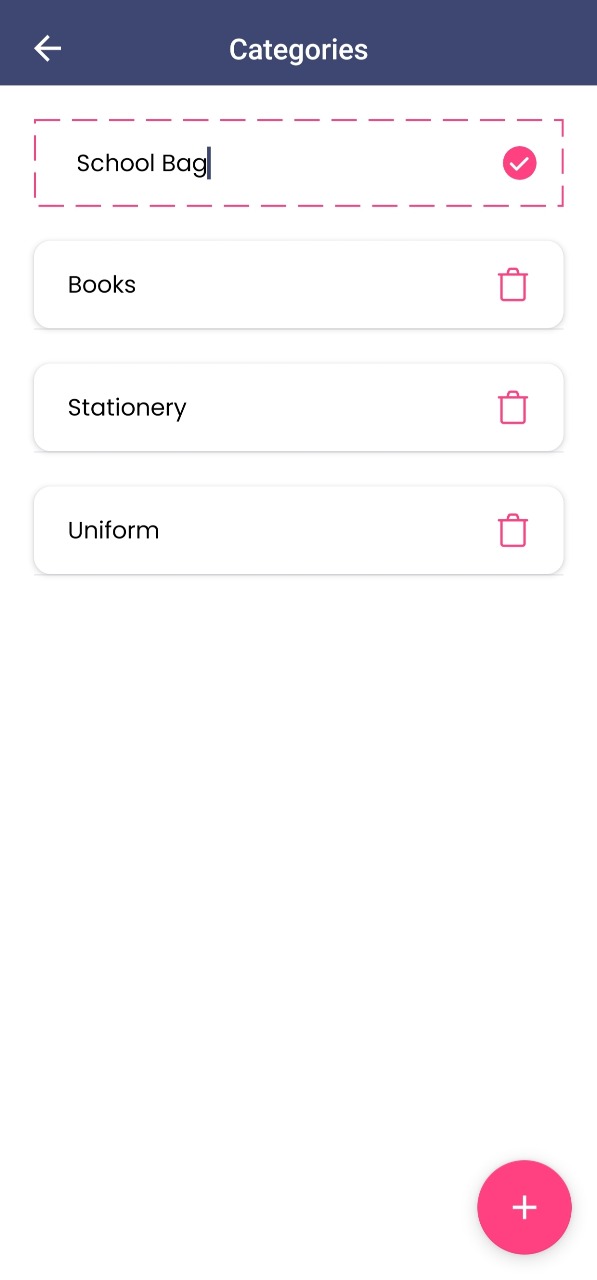
To create a new category, go to Inventory Management > Configurations > Categories and click the plus (+) button at the bottom-right corner. Enter the category name at the top and tap the tick ✔ to save. Repeat the same steps for each new category you want to add.
Stock Items
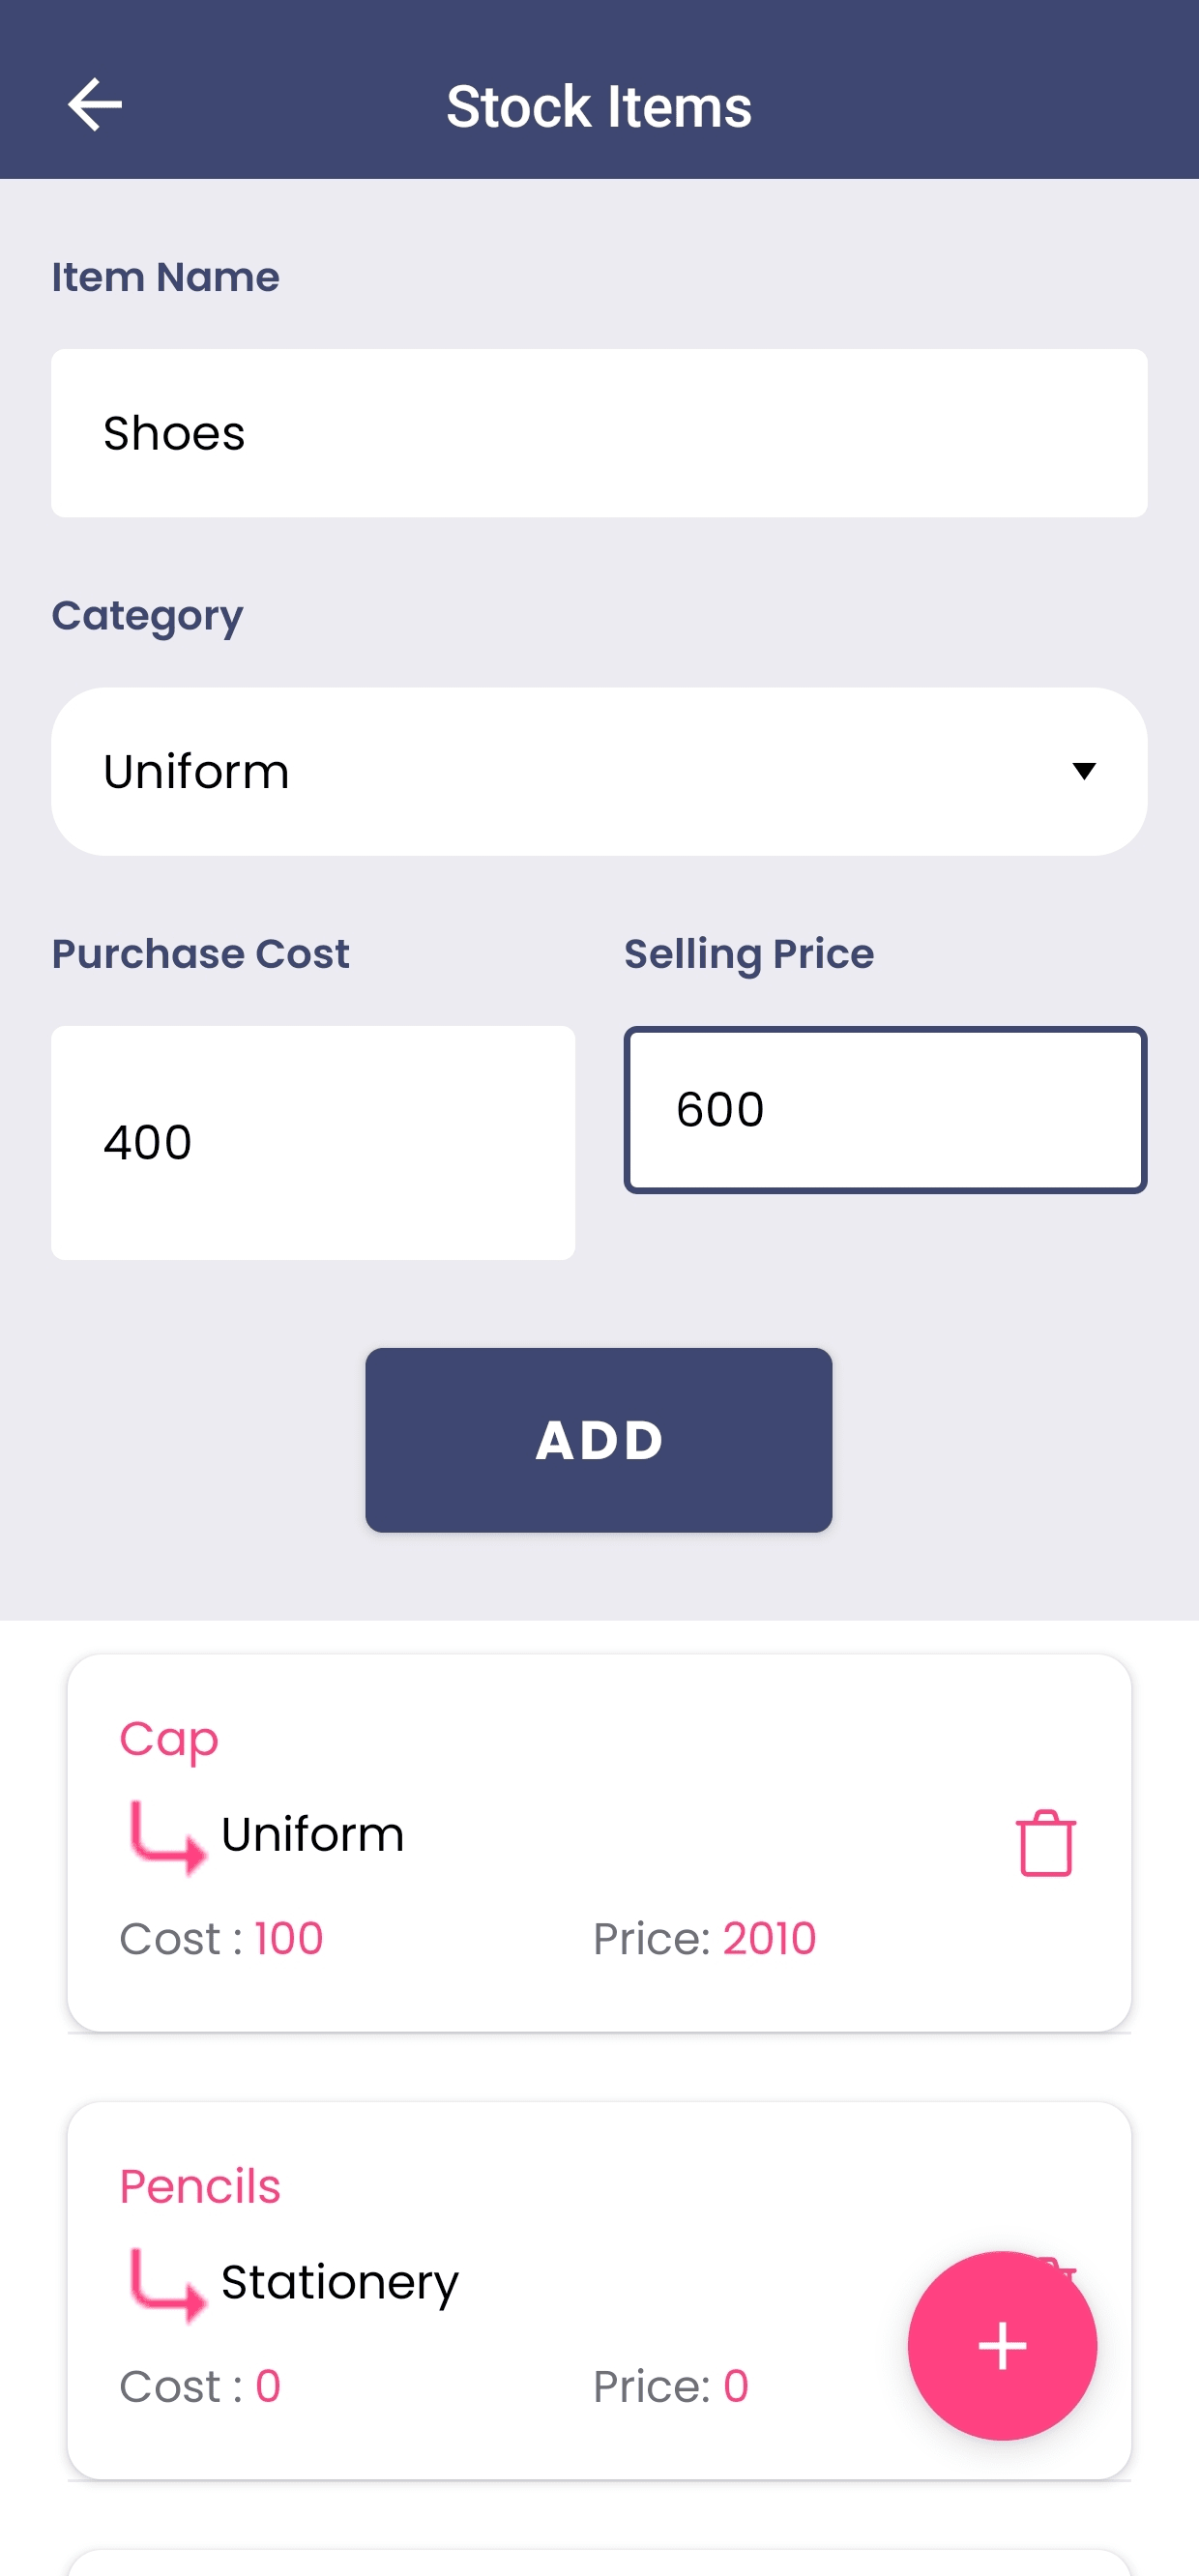
Once your categories are set up, go to the Stock Items section. By default, Kriyo provides a few sample stock items, which you can edit or delete as needed. You can edit them by tapping on the item or remove them by clicking the delete button.
To add a new stock item, click the plus (+) button at the bottom-right corner. Enter the item name, select a category, and fill in the purchase cost and selling price. These prices are for internal reference only and will not be visible to parents. Once done, click Add to save. Repeat this process for all the stock items you want to manage in your inventory.
Creating Bundle
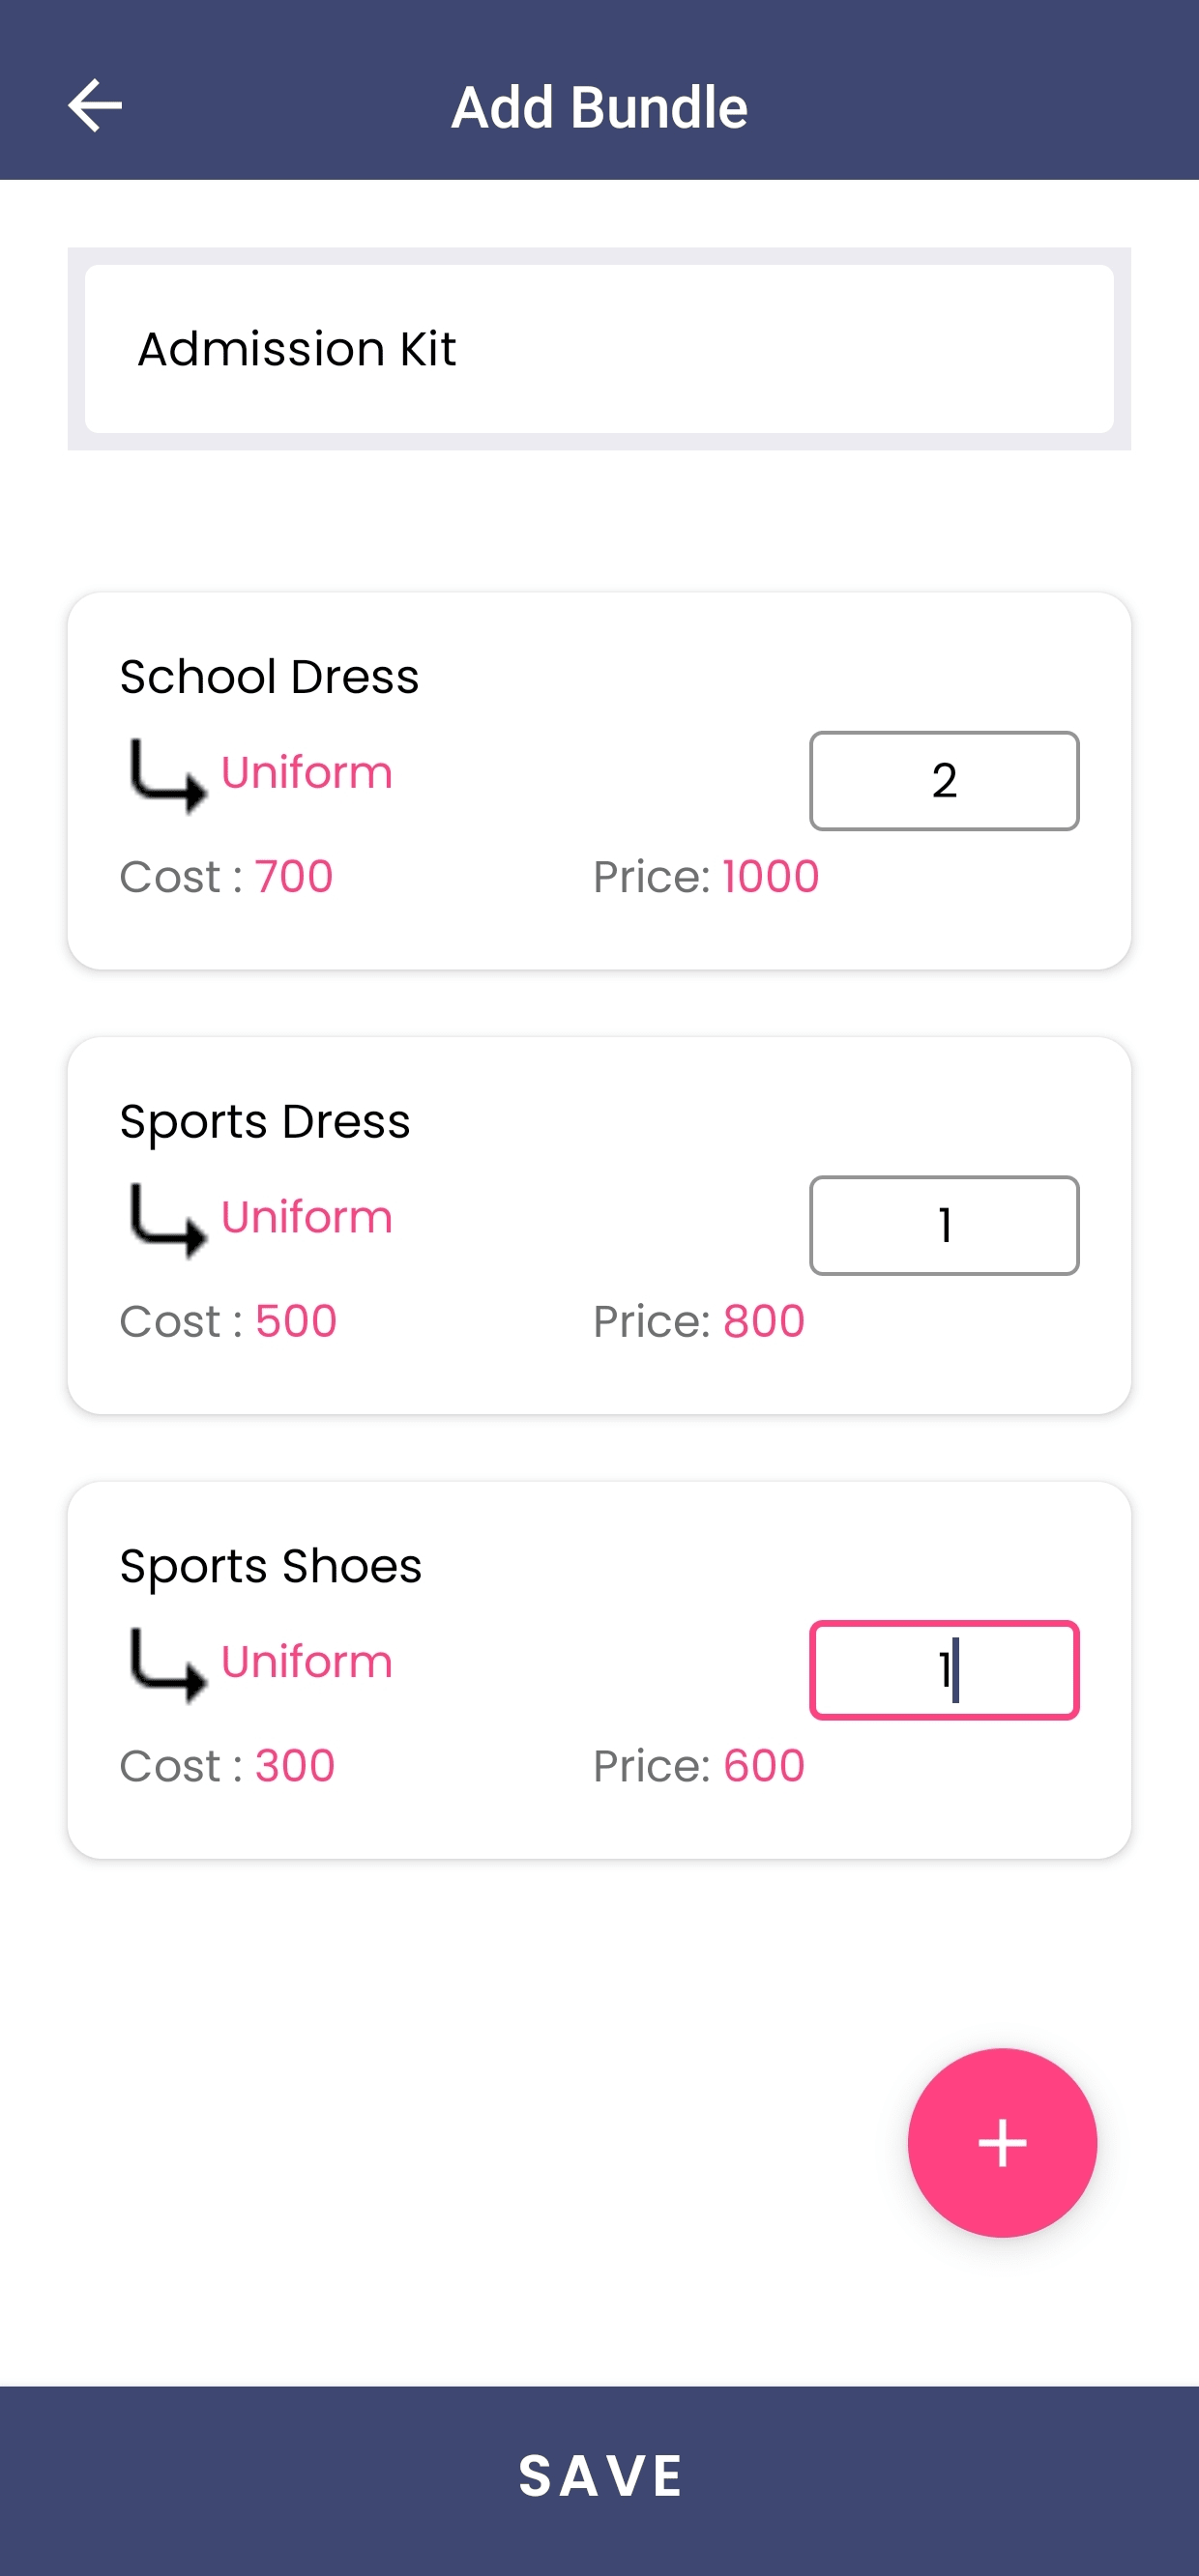
A bundle is a group of multiple stock items packaged together. For example, an Admission Kit or a Stationery Set. Bundles make it easier to manage and issue items to parents or place bulk orders.
To create a new bundle, go to the “Bundles” section under Configurations and click the plus (+) button at the bottom right corner. Type the new bundle name and then click the plus (+) button to select the stock items you want to include in the bundle and click Done. Here, you need to specify the quantity of each item in the bundle and click Save to complete the bundle creation.
Low Stock Alerts
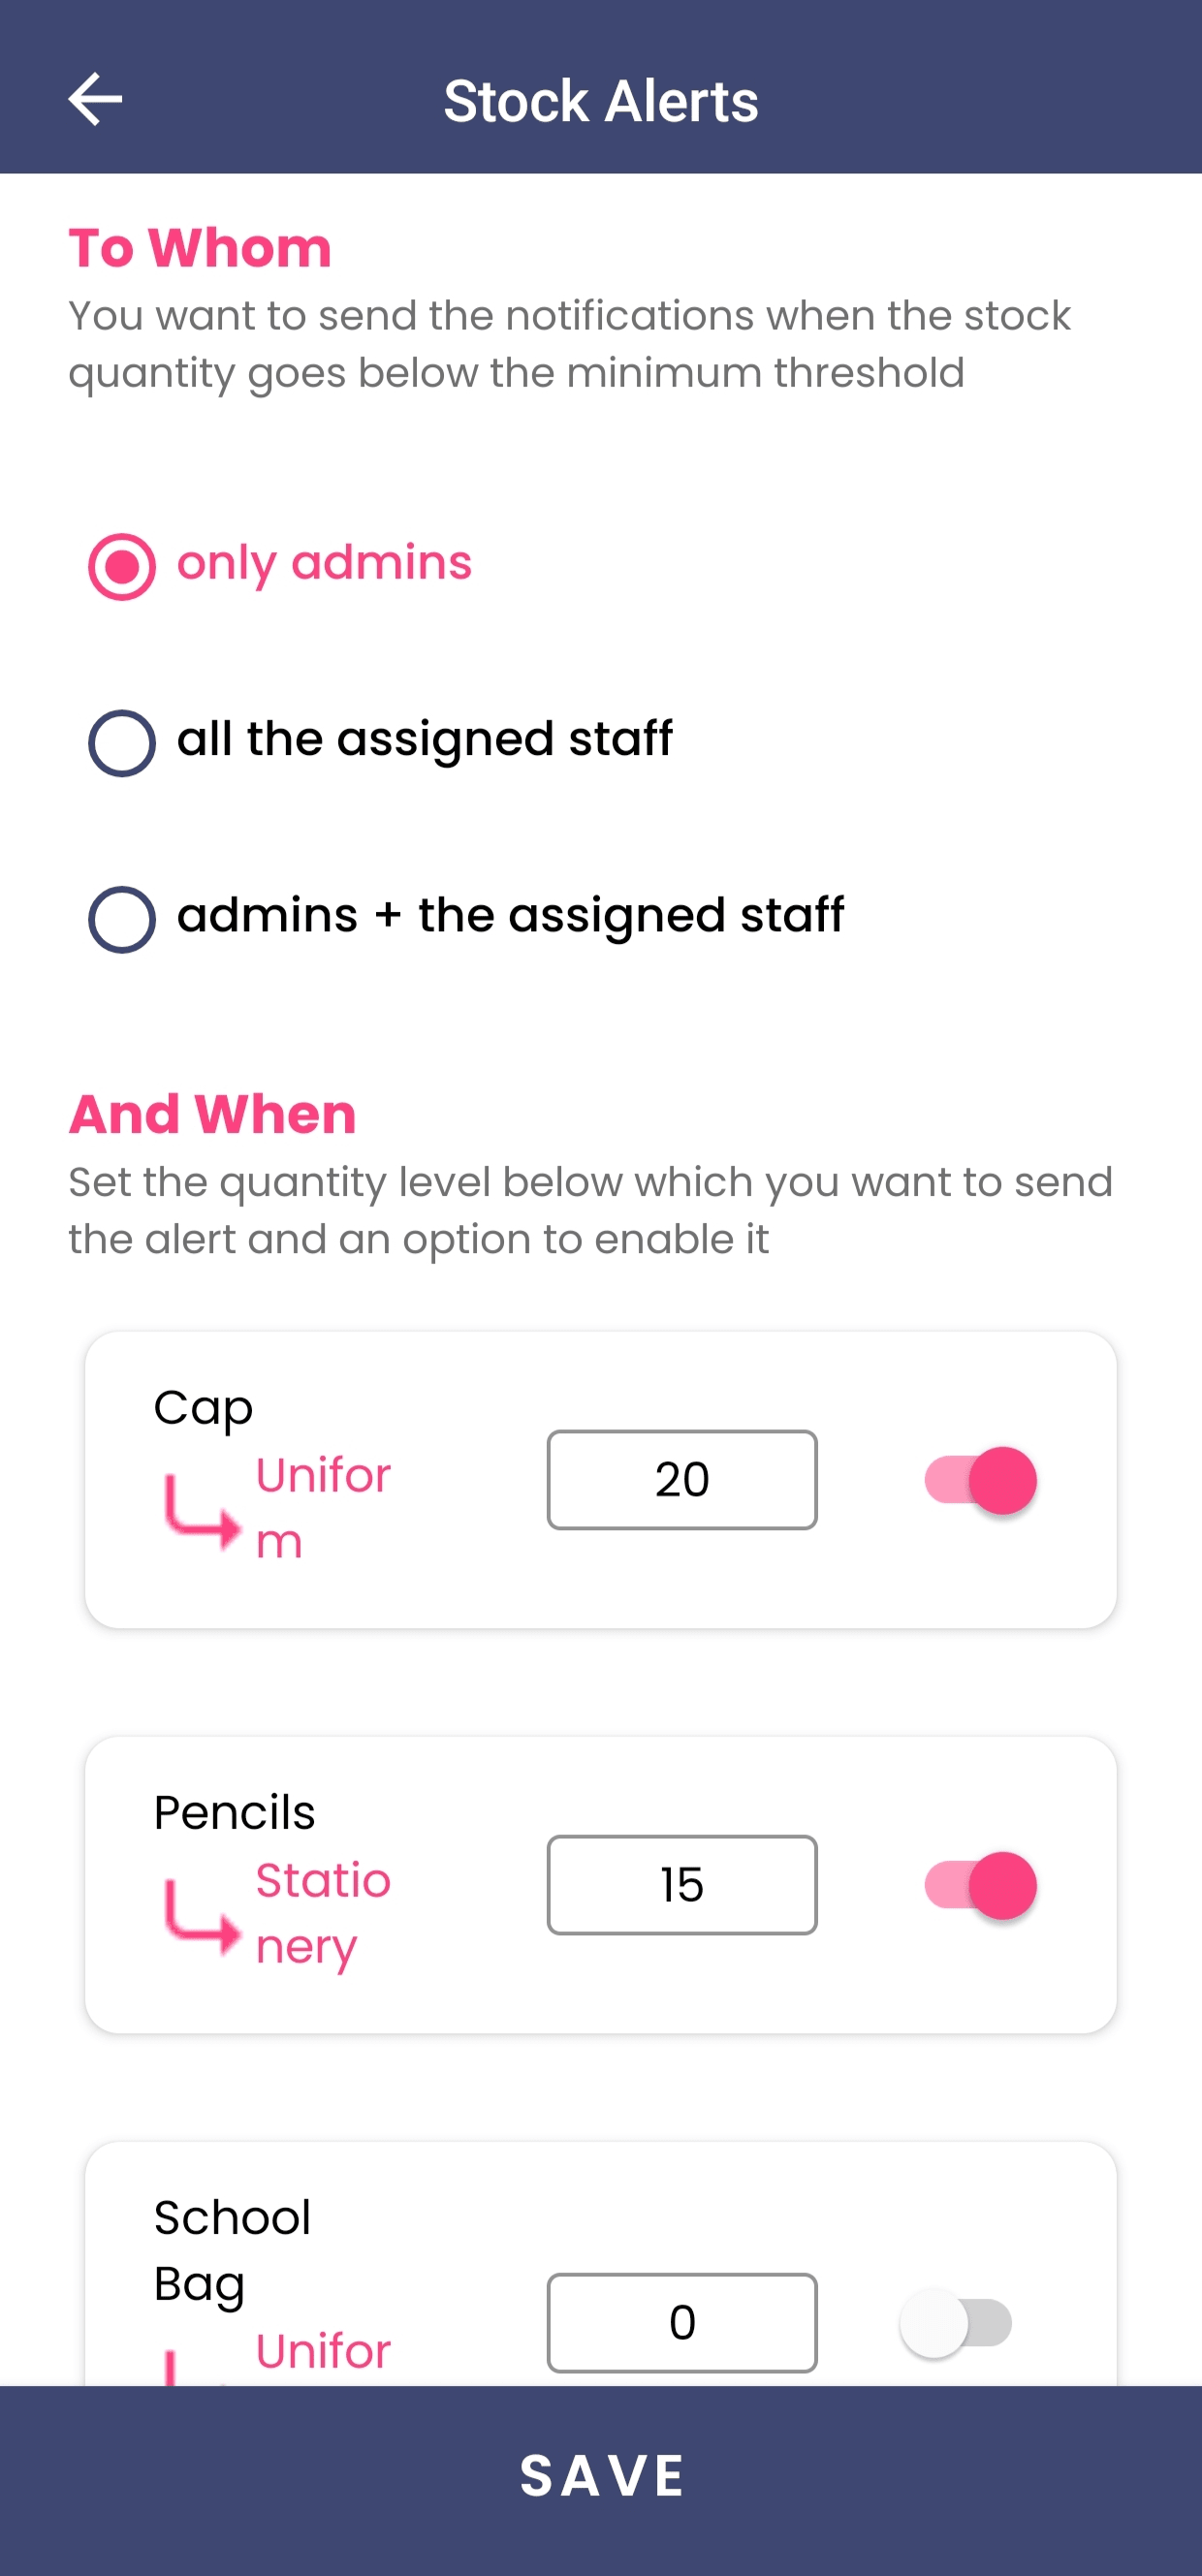
To ensure you never run out of stock, you can enable low stock alerts in Kriyo.
To set up low stock alerts, go to the Configurations section and select Alerts. Set the minimum stock quantity for the required items and turn on the low stock alert toggle. You can also choose who should receive these alerts by selecting the appropriate option at the top. Once done, click Save. Kriyo will then automatically notify the selected recipients whenever stock levels fall below the set limit.
Add Vendors
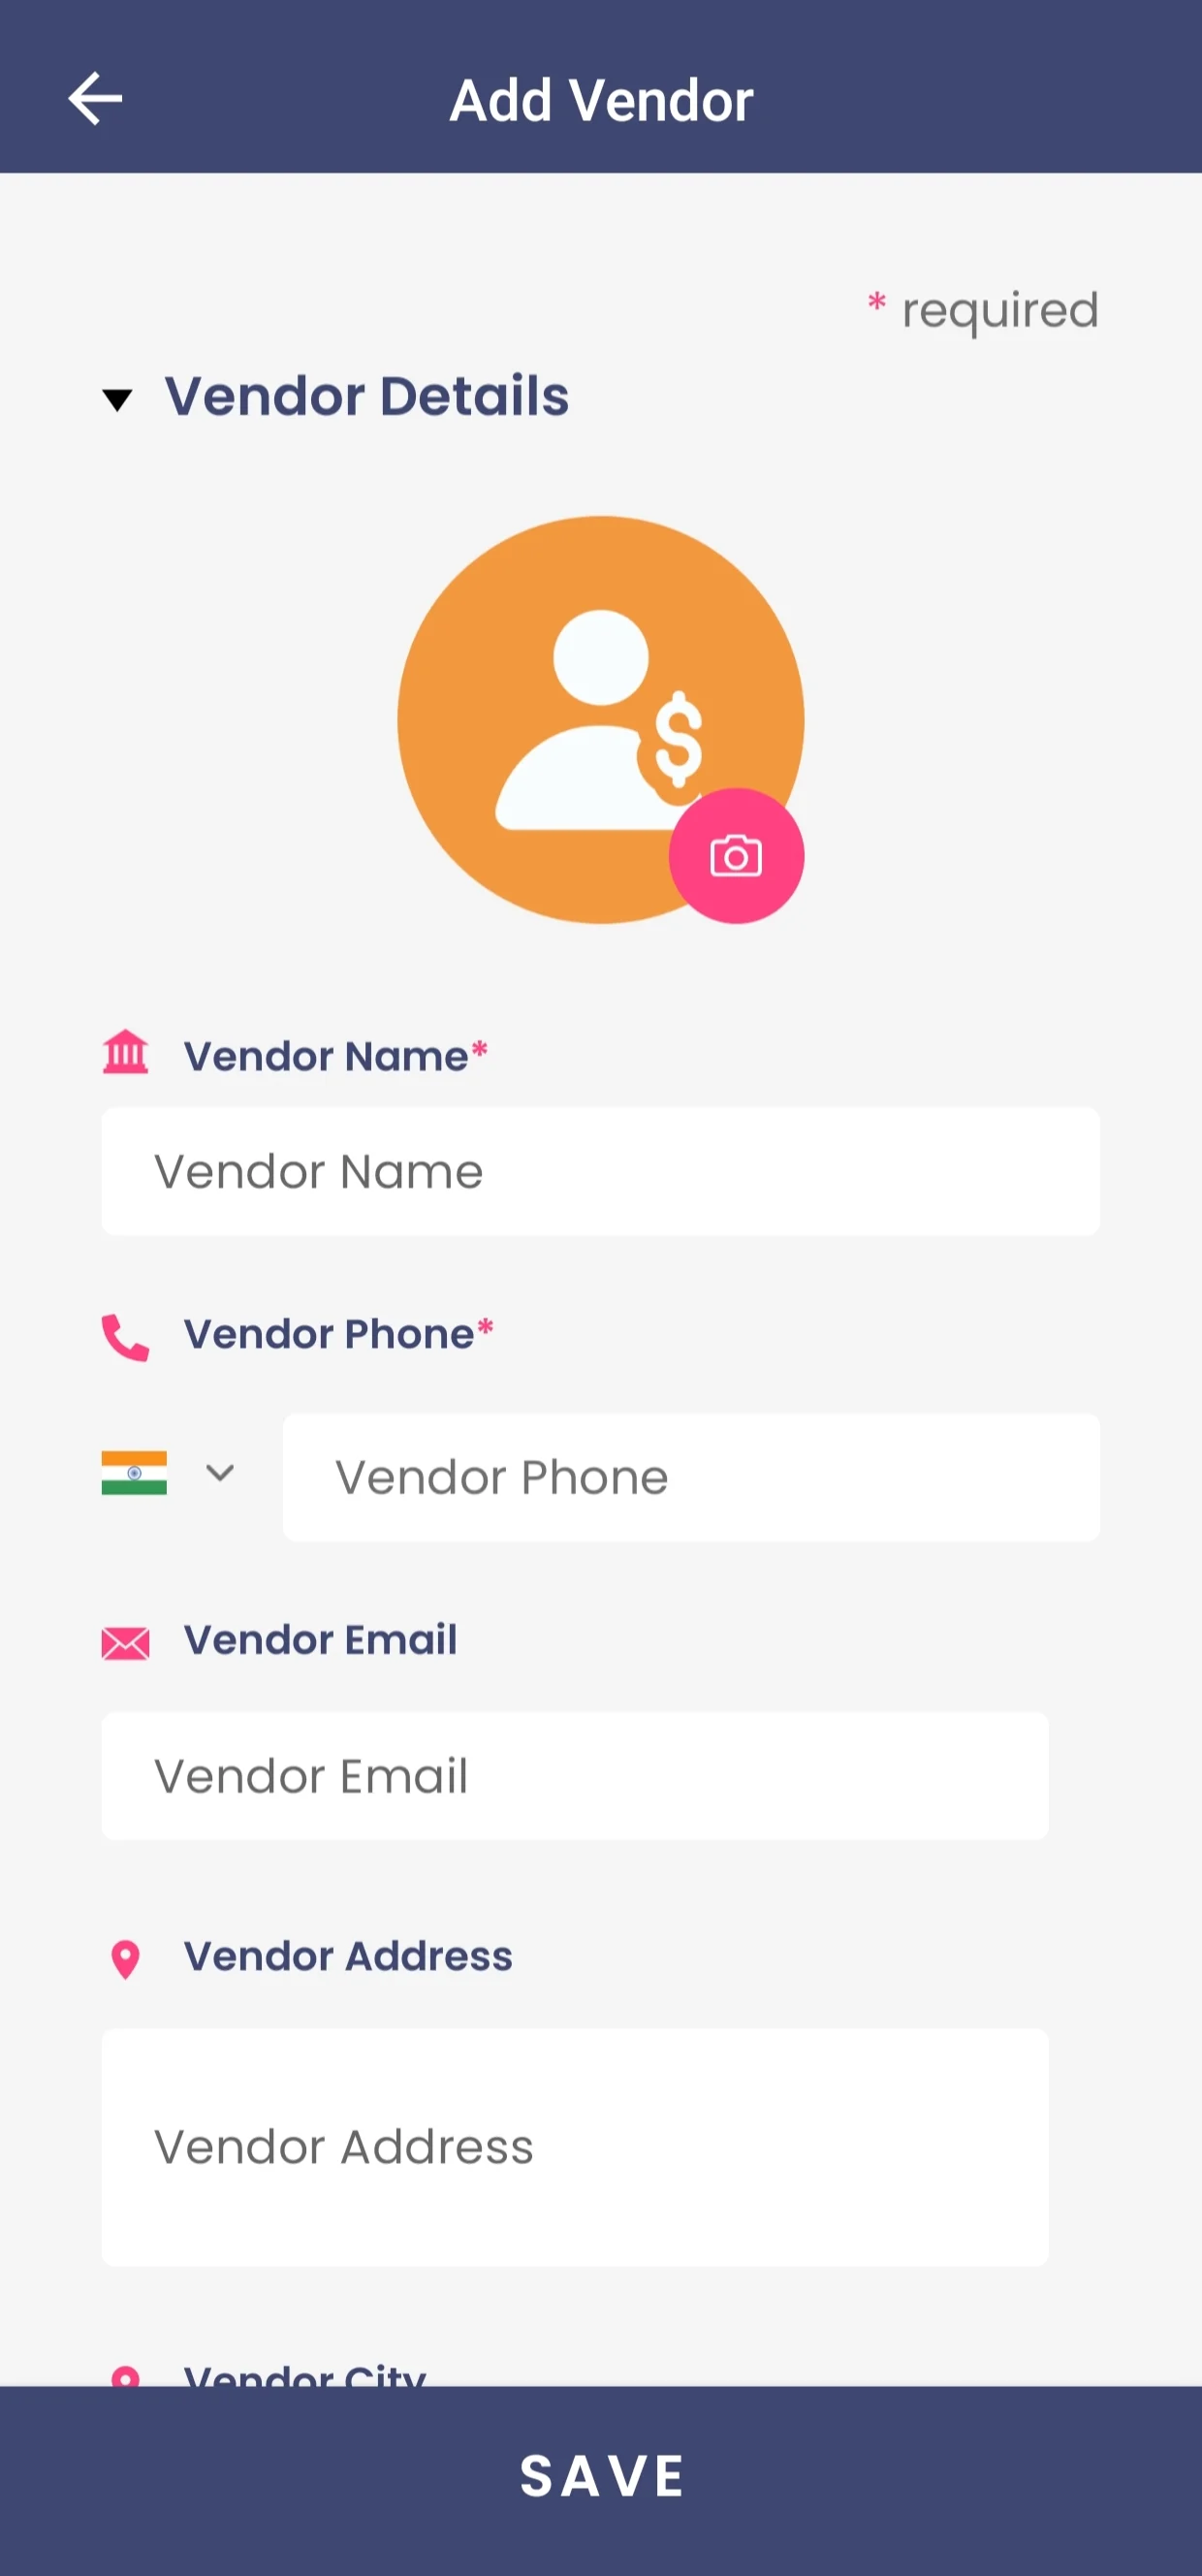
You can maintain a record of all your vendors, including their contact and bank details, for easy reference during purchases. For schools that are part of a chain, the Head Office will be added as a vendor by default.
To add a vendor, go to Configurations and select Vendors. Click the plus (+) button in the bottom right corner, then enter the vendor’s details such as contact number, PAN, GST, bank account details, etc. Once all the required information is filled in, click Save to create the vendor profile.
Update Current Stock
Once all your stock items are created, they will automatically appear in Current Stock. You just need to update the quantities of the items you have.
Go to Current Stock and click the Edit button at the bottom right corner. Enter the stock quantity for each item, then click Update.
Note: You need to enter the current stock only once during setup. After that, stock levels will update automatically whenever you issue items to students or receive new stock through orders.